
This week's block is called Whirlwind.


Print A - (mine is the striped fabric)
2 - 4+3/8" squares, cut once on the diagonal (notice how I cut my squares to have the
stripes running the same way over the block)
These will be the large pinwheels.
Print B - (mine is the orange dot fabric)
1 - 4+3/4" square, cut twice on the diagonal to make four triangles
Print C - (mine is the green fabric)
1 - 4+3/4" square, cut twice on the diagonal to make four triangles (luckily cutting the square into
four automatically has the stripes all going in the right direction)

All the pieces will end up being laid out like this.

I used a triangle trimming ruler to cut the points off the triangles. It just makes it easier to line up the triangles, but isn't necessary.
Scant 1/4" seam throughout.

Start by making four triangle units with the print B and C triangles. Press the seams to the dark.

Join the units to the large print A triangles. Press the seams to the large triangles.

These units need to be 4" square (trim in necessary).

Join two of the squares together at a time.

Because the seams are in opposite directions, the seams should lock together.
Tips -
Pinwheels can be tricky to get the centre nice, with the points all meeting at the right spot, but here are some tricks to help -

Since the seams are pressed to one side (I just finger press at this point), make sure the seams at the centre are in opposite directions. Pin the centre, with the seam on the top pointing towards the pressure foot (hopefully this makes sense, it is like the photos - my seam will be from left to right - I should have turned the photos).

This will help make sure that the seams will lock together, because the sewing machine's feed dogs underneath tend to pull the bottom layer faster and it will pull it into the above seam allowance (hopefully that makes sense!).

When you are stitching the centre, stitch just to the right of the point where the other two seams intersect (just above the stitch ripper in the above photo, but it can be seen better in the next photo. Just click on the photos to enlarge them). This will make sure that the points at the centre of the pinwheel aren't cut off.

To make the centre of the block flatter, spiral the centre seam allowances. This can be done by unpicking the stitches above the seam that was just sewn (just the one joining the two 4" squares, not the triangles),

or by opening the centre and unpicking the stitches in the middle (if your stitches aren't too short, they usually just pull apart).
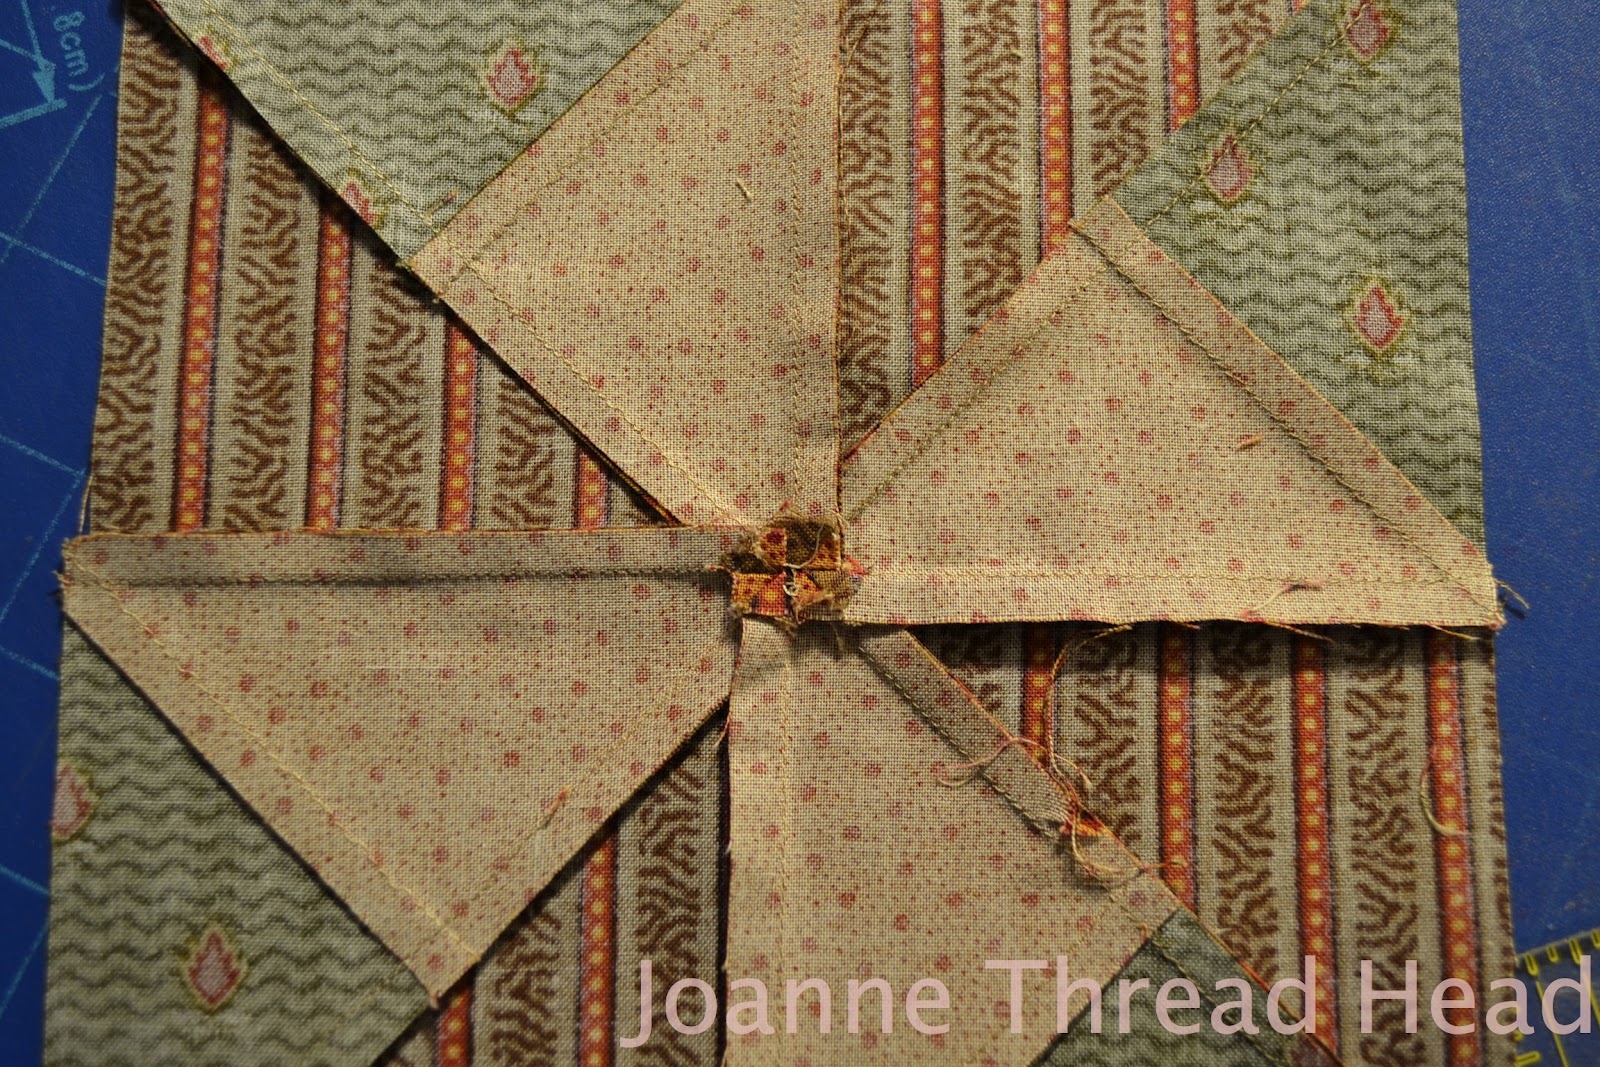
The above photo shows the spiralled centre.

The centre came out pretty good on this one. Whew!

Trim the block to 7+1/2" (it will finish to 7").


There are some great blocks on the Flickr Group! I look forward to seeing more.
Thanks for sewing along, and have a great day!❤
Thanks for sewing along, and have a great day!❤

