
 For this 8"x12" mug rug you will need -
-Fat Quarter of fabric for the background and binding (a directional print fabric works fine)
-Scraps of 4 different fabrics for the applique and half square triangles
- Roughly 12"x14" piece of fabric for backing and piece of batting (I prefer the heat resistant batting for mug rugs but any low loft batting will work - not so "tippy" for mugs)
-Freezer Paper (available at the grocery store)
- Glue (glue stick and liquid school glue or Roxanne Glue-Baste-It)
- Tools include pressing bars (not necessary but it does make stems easier), open toe embroidery foot for your sewing machine, small, sharp scissors.
 From the background fabric cut a 9" square (it will be trimmed to 8½" when the applique is finished) and cut 4 - 3" squares for the half square triangles (HST).
From each of the 4 scraps cut one 3" square for the HST
From the green cut a 1¼" wide bias strip (roughly 4" long) for the stem
For the Applique -
 Trace the three applique pieces (not the stem) on the dull side of the freezer paper. I also traced around some nickels and quarters to make some circles. Carefully cut all the pieces out.
 Using the glue stick, apply a small amount of glue on the dull side of the freezer paper and stick the paper to the wrong side of the fabric.
 Trim the fabric to ¼" around the shape (notice the shiny/wax side of the paper is up).
Repeat for all the shapes.
 Run a small basting stitch around all the circular shapes and gather the fabric around. This makes pressing the seam allowance much easier for any circular shapes.
 With the tip of a hot, dry iron, carefully press the seam allowance over the edge of the paper. The heat will melt the wax of the freezer paper and allow the seam allowance to stick to the paper.
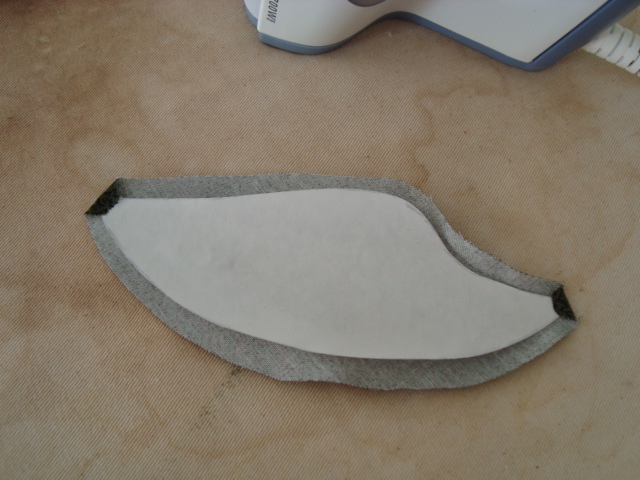 For the leaf, press the points first,
 then the sides. You can clip the inner curve to make pressing easier.
 All the pieces are ready for applique, plus the 1¼" wide strip has been pressed in half (these instructions are for an applique stem without pressing bars. If you have them use the 9mm one to make the stem).
 Place and pin the stem where you would like it,
 I laid the other pieces down to give me an idea of where it should go.
 Sew with a straight stitch, ¼" from the raw edge.
 Press the stem over.
Now the sewing machine needs to be set up for machine applique.
 Using a very small zig-zag stitch, with the tension slightly tight so that the top thread goes to the back slightly. I have a Husqvarna sewing machine and this is my setting. The stitch length is just slightly shorter than normal.
 I use a 100wt thread (very fine) for applique. Invisafil by Wonderfil and YLI Silk are my favorite, but you can also use an invisible thread (in clear or smoke) or fine thread. With the fine thread I use a #70 Microtex needle. The top thread should match the applique piece and the bobbin thread should match the background fabric (I use Aurifil 50wt for the bobbin).
 Stitch the stem down using the applique stitch. It should "zig" over a couple of threads on the applique piece, and "zag" off the applique piece. The sewing machine foot is an "open toe embroidery foot".
 With matching thread and the tiny stitches it is very hard to see, but it is a very secure applique.
 Next is placing the other applique pieces (the large circle and the leaf).
 Using the liquid glue, place small dots around the piece on the seam allowance (I use a large pin or toothpick dipped in the glue).
 Place the applique piece on the background (I use a ruler to weight it down and let it dry a few moments - this is usually when I change the thread on my machine).
You can use pins instead of glue, but the glue allows the applique piece to lie flat and it doesn't move.
 On the back, carefully cut out the background fabric behind the applique, leaving a ¼" seam allowance.
 Gently remove the paper (use tweezers if there are small pieces left). Repeat for the large circle.
 Glue the small circle (flower center) and stitch around.
 Remove the paper. When doing the applique method it is important to work the pieces in sequence (from the back pieces to the front applique pieces) and to remove the paper as you go. Trim the block to 8½" square.
To Make the Mug Rug -
 With the 3" squares make half square triangles. Using one background fabric and one scrap fabric for every HST set. Draw a diagonal line on the back of the lighter fabric (with correct placement you can match directional fabric) and stitch ¼" on either side. Cut on the line. Press the HST open. Trim these blocks to 2½" squares.
 The squares make 8 HST. Sew them in two sections,
 and stitch on either side of the block.
 Randomly applique the remaining small circles.
The mug rug is ready for quilting with the batting and backing. Bind with 2¼" wide strips of the fat quarter.
 Another variation. Mug rugs are a great size to practice free motion machine quilting on,
 and make great gifts.
I hope you find this tutorial helpful.♥
Here is the pattern-
 This is on a regular sheet of paper. (Save the image and print it on a full size piece of paper - either with "Word" or a Print Shop type program - or ask a teenager/young adult for help - that's what I always do.)
If you have trouble getting this pattern, please contact me and I will email you a word document with the pattern.
If you are looking for an easy way to make a light table - instructions can be found here.