Showing posts with label Russian Punchneedle Embroidery. Show all posts
Sunday, April 22, 2012
More Dear Jane
Today I made 5 more Dear Jane blocks, now there are 12.
There is a very helpful website - That Quilt - that has instructions for all the blocks (since the book has none).
This one was tricky and took me a few hours (for a 5" block!! Now I think my quilt is getting smaller by the day - maybe it will just be a table runner!), but at least I made it.
I paper pieced it - the above piece of paper is 3", it is the centre of the block.
The method I use, you don't sew on the paper, but fold all the lines before stitching,
and then stitch beside the fold. There is a good tutorial here.
I don't use freezer paper since I am just making little blocks. I use a bit of glue stick glue to set the first piece and work from there. Also since I am using cheap paper, just drawing the lines is enough to score the line for folding.
I said that the above block was tricky, but maybe I was having an off day -
this one stumped me too! The centre was supposed to be cream (it is now). I paper pieced it too.
There are so many beautiful variations of the quilt (google images), that I think I will start picking and choosing which blocks I will make, because I know I won't have enough cream to make them all.
I have made my Dear Jane blocks for this week (I am trying to make a few a week) and have cleaned my sewing room, ready for a different project (maybe another small quilt of the month).
I have been using scrappy tumblers as "leader and enders", and made quite a few rows this weekend - I think I almost have enough to sew into a quilt top (this will be a charity quilt).
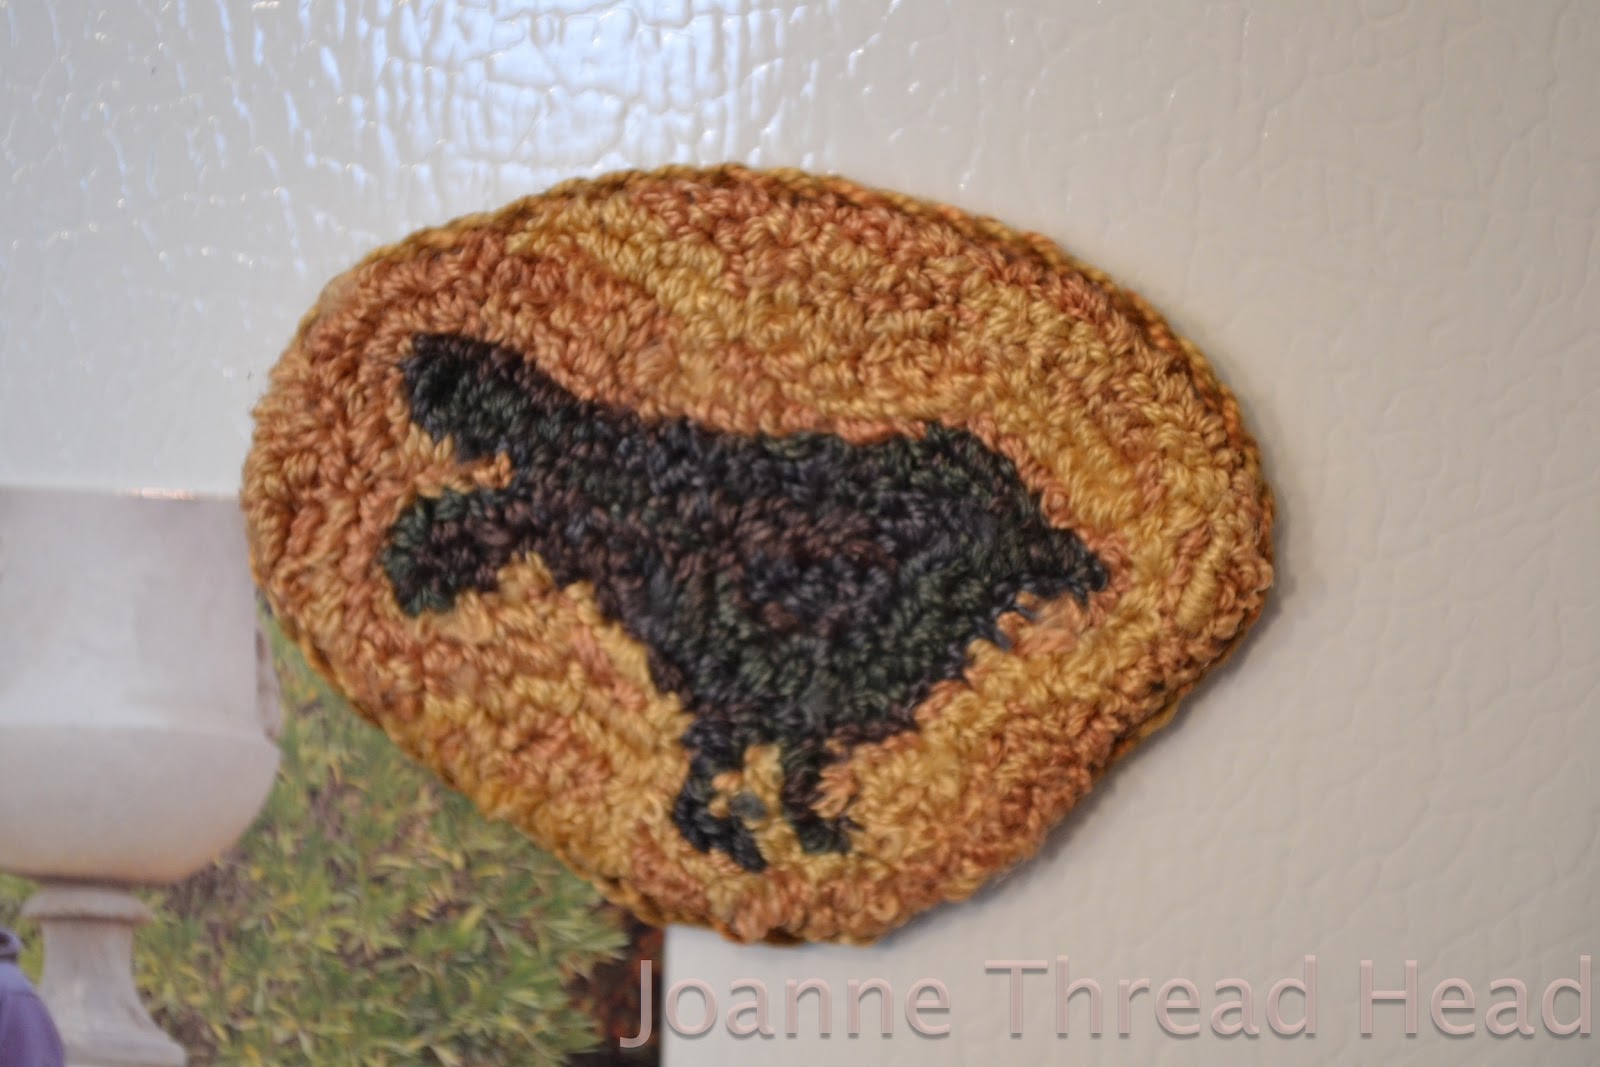
I turned the little piece of punch needle embroidery I made the other day into a top for an old tin.
This is the tin after I spray painted it with some paint I had.
Have a great day and thanks for stopping by!❤
Update - Here is another lovely Dear Jane blog - "Janiac's Unite" - thanks Heather.
Friday, April 20, 2012
Frustration
I finished Crosses Mourning - January's small quilt of the month. It is 17" square, the blocks are 5". The pattern is from Kathleen Tracy's Prairie Children and their Quilts.
I used wool batting for the "puffiness".
This is the back of the outside border - I chose a simple feather border ("open-heart feather"), because I knew that quilting wouldn't be visible in the border fabric, but I love feathers and add them when ever possible! I did stitch on the binding before quilting the border - I find it helpful to make sure the design fits in the space, especially when the border is narrow (the above border is 2" wide).
My frustration came when I broke...
one (oh no!)...
two (aahhh!)..
three (arrghh!!!) titanium needles in a span of 5 minutes!!!
I was just quilting the above quilt - regular fabric, wool batting, sewing slowly - nothing unusual! So much for titanium needles bending instead of breaking (although one bent before it broke into 3 pieces -it even froze my sewing machine, with a huge exclamation point for warning on the display screen - "motor overload"), or finding out if titanium needles last 5 times longer than regular needles!
I switched back to a Mircotex needle for the rest of the quilting.
After the little quilt was finished I decided that it was enough quilting for a day (three broken needles before 8am was enough), so I switched hobbies and made another piece of punch needle embroidery. This one is 3" across. It is going to be put onto a small tin (more when it is finished).
Have a great day and thanks for stopping by!❤
Thursday, March 29, 2012
Igolochkoy
It is Spring Break for my youngest son and we spent a couple of days in the States at the beginning of the week. Fargo, ND, is an easy three hour drive south of here. My favourite store is there - Nordic Needle.
I, of course, indulged in my obsession with thread! All the beautiful colours and textures are so appealing - my blog is appropriately named by my oldest son.
I finally tried Igolochkoy (ee-gó-luch-koy) - Russian Punchneedle Embroidery with some of my new threads when I got home (I have had the tools and book for a while).
The work is done from the back with the little punchneedle tool, I used 3 strands of embroidery floss (these ones are overdyed) for this piece. The fabric is held drum tight in the hoop. The penny is just for scale.
The pattern for this is from the book "Miniature Punchneedle Embroidery" by Linda Repasky.
Instead of making it into a pin like the one in the book, I glued it to an old magnet (lightly sanded first), and trimmed around it.
I then glued a twisted cord around the piece.
I seem to have been making lots of twisted cord recently. I make twisted cord using a bent nail in the drill instead of a drill bit. I place the other end of the thread around a pencil that I put in a drawer in my craft table. Super simple and no fancy tools required!
The above picture is actually my first attempt at punchneedle - I quickly learned why you are not supposed to use 100% cotton fabric, when I reached the middle all the the fabric gave way - there is a large hole in the centre. I then tried it with polyester/cotton fabric, it was much easier and no hole! Weavers Cloth (a polyester/cotton fabric) is recommended, but I couldn't find any.
These pillows are made using a very similar technique, only with a larger punchneedle tool and wool, on velvet. The tops of the loops are cut off, and each section is trimmed for a 3-D effect. I made these about 30 years ago (yikes - I must have been a baby!). The flower one was started by my grandmother, the other pattern was hers also.
When I was at Nordic Needle I decided to buy these two Romanian Point Lace books - I thought it was about time I had actual books on the subject.
Since I posted my RPL tutorial (2 years ago this summer), it has remained the most viewed thing on my blog - far outnumbering everything else on a daily basis. I am amazed since I consider this a "quilting blog".
Speaking of quilting - the pattern for the fifth Temecula Quilt Co block of the week - Blessings - came out today. Tomorrow we will get the finishing instructions.
I didn't buy any fabric while I was in the States - I did go to some quilt stores, just didn't find anything - I guess I really don't need any more fabric, and there is a large quilt show coming up in Winnipeg next month which I am really looking forward to.
Have a great day and thanks for stopping by!♥
Subscribe to:
Posts (Atom)