I have been making Dresden Plates! The online information and videos for making them has been wonderful. They were much easier to make than I thought they would be.
I used the book and template by Anelia Belden (if you click on the "Google Preview" on the link you can view the book), but there are lots of similar templates out there. I decided to go with a template instead of a GO! die because I thought there would be less fabric waste (there was really very little).
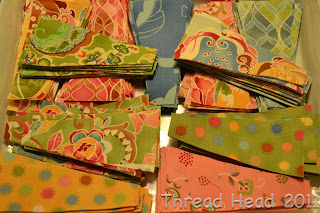
I used 4+1/2" strips of fabric and cut up 11 fat quarters in no time at all. The fabric is Boutique by Chez Moi.
I decided on the "peak top" for the dresden plate blades,
and chain pieced the the tops.
When I was preparing to sew the tops I finger pressed the centre
to make it easier to line up the centre when I pressed the point (I did trim the seam allowance at the point and pressed the seam open).
The blades are sewn together starting at the end with the point. After it took a bit of fiddling to get the DP's to lay flat I realized that I had to sew a slightly wider seam allowance as I got closer to the centre when joining the blades. This seems to be a common problem even with the GO!.
I made the centers 2+1/4", using the freezer paper appliqué method (the stencil works great for appliqué circles).
I decided to appliqué the centres before appliquéing the Dresden Plates to the background square (easier to remove the freezer paper - I didn't want to have to cut the background square to remove the freezer paper).
I used a tiny zig-zag and 100WT thread.
It didn't take long to make the 25 DP's I needed.
Once again I used a tiny zig-zag and 100WT thread to stitch the DP's to the background square (I used a 14+1/2" square of ivory Kona cotton - finished size of 14").
I sewed the blocks together on point with setting triangles and corners (just because I preferred this look than to straight rows). The DP's are just over 10". I used large squares of fabric for the background because I wanted to have lots of room for quilting.
I am working on the border now.
The partially finished quilt top is in the spare bedroom, where I think the finished quilt will go. My oldest son told me it looked old - that is exactly what I wanted!
Have a great day and thanks for stopping by!♥
Tomorrow is the draw date for the book I am giving away.


