
This post had been in the works for a while, I just don't take the time to blog much anymore - too many other things to do and life is short.
My free motion quilting class filled up, and was so much fun for me!! Usually I teach the class as a one or two day workshop, so it was wonderful for me to see how everyone improved over the weeks - and every one always does improve (I love hearing from former students to see how their machine quilting is going!). Thanks to everyone who took the class ❤! There will be another class in Spring 2015!
Back to dyeing!
One of the joys of spinning is seeing different colours slip through my fingers, and having dyed those colours and then seeing how they come together into yarn and then a finished piece is magical. I have dyed cotton fabric before, and find that I have a hard time getting the fabric to be colourfast, but with wool fibre (really animal fibre - silk included) dyeing beautiful, bright colours, that stick, is very easy.
This is just what I do - nothing scientific (i.e. measured) or repeatable for me, just fun and easy, with lots of pleasant surprises - truly playing with colours! I recommend the video by Deb Menz - 'Dyeing in the Kitchen' for a more 'scientific' approach.
Be warned this is a long post with lots of pictures! When I was starting to dye, I just didn't think there was enough information available.
I use Jacquard Acid Dyes (called acid because they need an acid - white vinegar in this case, to 'set' the colour), that I then steam set the fibre that is wrapped in plastic wrap in an old canner.

I do take some precautions - I dye in my laundry room away from everyone. I wear a dust mask when I am working with the dry dye powder, there is also a wet paper towel on the counter to catch any loose powder. I wear rubber gloves, old clothes and an apron - dye sticks. Everything I use is only used for dyeing - spoons, containers, steam pot, towels...
To make the dye stock solution I use about a teaspoon of dry dye powder,

and about 1/4 cup really hot tap water in a jar with a tight fitting lid.

With the lid on the jar, I shake it until all the dye is dissolved.

I then pour it into a small container with a sealable lid. I rinse the jar with more hot water and add it to the container to make almost a cup of stock solution. These are measurements that work for me, with the containers that I have.

The stock solution keeps - so I mark the colours. Some colours keep better than others.

My stock solutions for various colours-

I have only dyed wool or wool/silk roving for spinning, but this will also works for wool yarn.
I soak the roving to be dyed in a tub of warm water, to open up the fibres ready for dyeing.
This one is Merino and Silk Bare Gloss Roving from Knit Picks (I have good luck with this roving - it dyes wonderfully, easily spins up nice and soft, usually comes on sale for a good price. I have tried other Knit Picks roving, but this is the only one I buy now, the others just aren't as nice).

After soaking for about 20 minutes, I gently squeeze out as much water as I can (if I want there to be white left in the roving after dyeing, I will even put it in the washing machine to spin out as much water as possible).

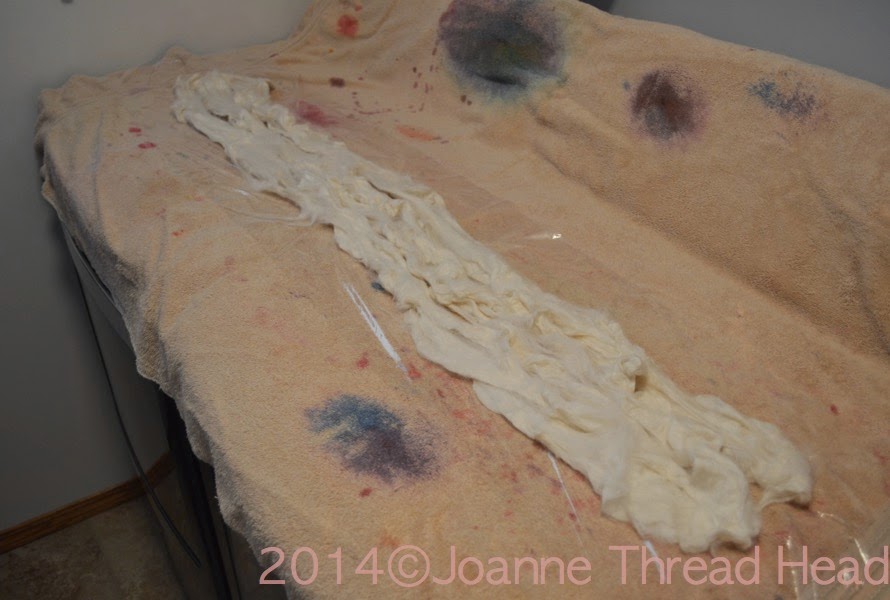
I lay an old (dyeing) towel on the washer and dryer (any large flat surface). On top of that I lay out a long piece of plastic wrap (cling wrap..).

Carefully lay out the roving (the plastic tends to shift easily) in one layer. There is a couple of inches of plastic left bare along the length of the edges - important for later.

You can get different effects depending on how you lay out the fibres - this one is just back and forth along the length of plastic - I wanted short colour repeats.
Now for the fun!
I mix colours in about 3/4's of a cup of warm water - I just pour the stock solution,

or sometimes I use an old syringe.

I also use the syringe to mix the colours, and then test them on a paper towel.

I rarely use the colour straight from the jar, I like to blend colours together to see what happens.
Next I pour the dye onto the roving.

I wanted short colour repeats for this one, so I poured narrow bands of dye.

I added many colours - all shades of green this time.
This colour was a mix of yellow and black - it makes a lovely shade of green (who knew!).

I keep adding different bands of colour until the roving is well covered. There is a limit to how much liquid the roving holds - it is trial and error.

I sometimes add drops of dye with the syringe - just for splashes of colour.

Enough colour -

Next I spray the whole thing with straight white vinegar, that I keep in a spray bottle. Just one side is enough.

Then I 'smoosh' the dye and vinegar into the roving.


Along the whole length-
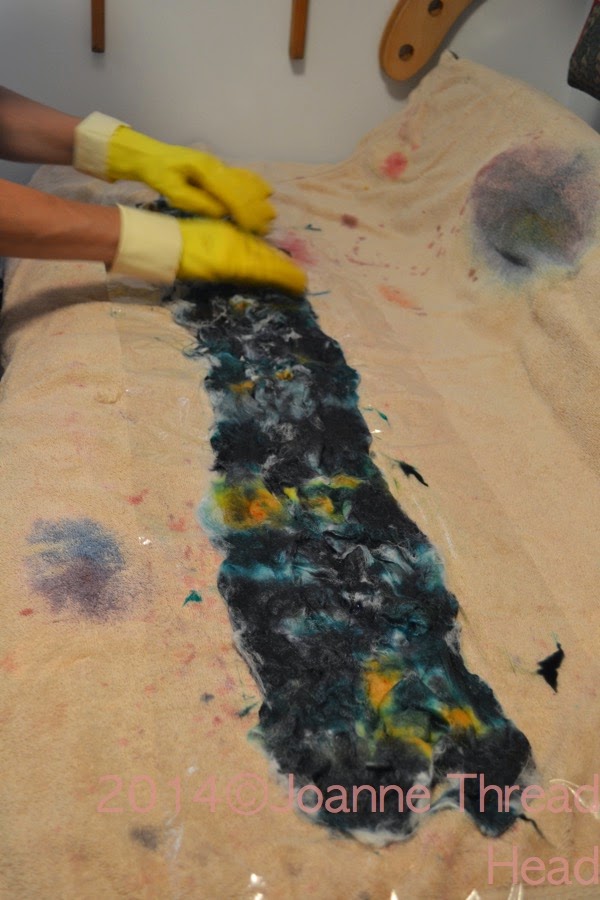
When I was doing this my son, who took all these pictures, at this point asked me when it would turn red - he thinks everything I dye is red - what can I say, red is my favourite colour!
You can see that the colour is now through the roving -

I don't need to flip anything over.
Time to wrap up the fibre bundles -

Starting with the long sides (why they were left uncovered) -

And then roll up the bundle lightly-


And carefully, chances are there is a lot of liquid in there.


I lift up the end of the plastic wrap because I know there is extra liquid.

I then place the bundle in an old canner with a couple of inches of water in the bottom (notice the extra liquid on the floor! Dye cleans up easily with bleach).

I use an old canner (I only use it for dyeing now), with the canner insert turned upside down to hold the bundles above the water. This one I covered with foil, with a few holes cut in for drainage.

I see these canners cheap at second hand shops. This works well for me. I know some people steam the bundles in the microwave - but that scares me, I have heard the word 'scorched' being used.
My canner holds 3 or 4 bundles, if I am dyeing I always dye a few - there is that red! Just one layer of bundles.

They need a bit of space, because they will grow in the steam.

I usually steam them, with the lid on, for about 30 minutes (the 30 minutes is timed from when the water underneath starts boiling) . I keep an eye on it to make sure the water doesn't run out - it is just a very gentle boil, on low - just enough to create steam - with the lid on, set on low, and a couple of inches of water, I have never had the pot run dry.

After about 30 minutes I put the canner out to cool (outside or in the garage - wet, hot wool has a bit of a smell that my family doesn't enjoy).

When the bundles are cool enough to touch with rubber gloves, I open up the bundles to cool faster. I am supposed to leave them to cool naturally, even overnight, but I just don't have the patience for that.

Then I very gently wash the roving with a very small amount of blue Dawn dish soap and rinse it. Making sure not to change the temperature of the roving drastically or agitate it - wool felts easily.

I spin the roving in the washing machine to get as much water out (I have a top loading machine, everything just sticks to the sides when it spins - no agitation). Make sure that if you do this that the next load you put in your machine is a dark load and not your best white clothes (ask me how I know!).

I lay out the roving to dry. It comes out all skinny,

but I pull it apart gently to fluff it out.

I am always pleasantly surprised when it is all dry!

How the colours have interacted with each other and created new colours is wonderful.

You can see in this flash photo the nice shine the silk and merino roving has-

I spun this roving-

into this yarn-

a chain plied (3 ply), fingering weight yarn

and then knit this entrelac cowl-

More details on the cowl can be found on the project page on Ravelry.
It truly is a joy to play with colours!
Whew!! I am sure that was 2 months worth of blogging - thanks for your patience!
Have a great day and thanks for stopping by!♥