Monday, January 31, 2011

One World One Heart 2011


OWOH
Thank-you Lisa for hosting this!

Welcome to my blog! For those who are new here, my name is Joanne and I am lucky enough to be a stay at home mom with two fantastic sons and a great husband. We live outside of Winnipeg, Manitoba on the beautiful Canadian Prairies -

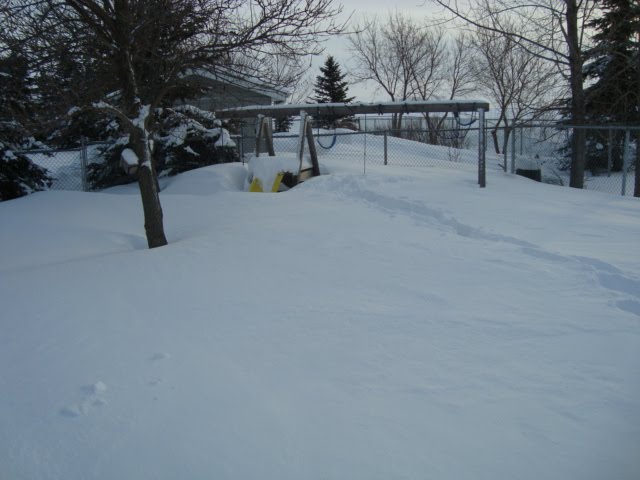
Although it currently looks more like this -

I have made things as long as I can remember - sewing, embroidery, pottery, stained glass, knitting, lace making, quilting... My blog is mainly about my quilting adventures, but also includes some other projects that I work on (including Romanian Point Lace).
I hope you will find something that you like on my blog and drop by again!

On to my giveaway!

I made a 20"x13½" (51cmx34cm) mini quilt that can be used as a wall hanging (it has little hangers in every corner so it can be hung in any direction) or it can be used as a table mat (it is heavily machine quilted so it lays flat). It is made with reproduction quilting cotton (Reflections of an Era Past by Paula Barnes), with cotton batting and muslin backing, and it is free motion machine quilted.

The giveaway is open to all active bloggers world wide.
To enter just leave a comment on this post (make sure I have a way to reach you, and I would love to visit your blog too). The winner will be determined by random number generator on February 17th (after 6pm CST), announced here, as well as emailed.

Thanks for stopping by and good luck!!

Give away is now over. Thanks so much to all that entered!!
The winner was Lynn Stevens.

Sunday, January 30, 2011

Alternating Blocks

Today I cut out all the pieces for the rest of the 41 Alternating Blocks needed for the queen size quilt in the Quilt Along.

I was pleased to have all the instructions online because it has been awhile since I made the first ones of these blocks.

I now have 27 blocks made, so 14 left to make, hopefully I will get them done this week (as well as a few extra because I used the whole width of the fabric).

These blocks work well together too, but I think they do a great job of setting off the scrap blocks.

I have come to the conclusion that black quilting cotton is hard to find. Last week I had trouble finding enough black for the Granny's Hankie quilt and for this one I had to use two different blacks for the diagonal squares because I couldn't find enough of one.

We braved the cold temps and played out in the snow today. It has been a long time since I have seen so much snow!

Tonight at midnight is the start of One World One Heart 2011 and I will start my giveaway tomorrow.

Have a great day and thanks for stopping by!!

Saturday, January 29, 2011

January's Granny's Hankie Block

I finished appliqueing January's Granny's Hankie block.

Things went well once I realized that the pattern is not symmetrical and I put markers on the block and pattern. The colours are really bright in person. I know I am going to enjoy this BOM, but a month seems like a long time to wait for the next pattern!

We have had so much snow this year, and although it is hard to tell in the picture (I missed the large trucks and bulldozer that were at the bottom of the hill), I have never seen so much snow at this snow dump (the hill is really very high).

Have a great day and thanks for stopping by!!

Friday, January 28, 2011

BOM and RPL

I got all the applique pieces ready for January's Granny's Hankie BOM.

They are all ready to be stitched down. I am going to machine applique them using the freezer paper method.
I had forgotten how much easier it is to use batiks for this style of applique than regular fabric. Plus the block is 16" so the applique pieces are nice and large. It is going to be a fun BOM.
The pattern for this will only be up until the second Saturday in February - when the February block pattern is posted.


My only concern is that the dark green blends into the background too much (it looks a bit better in real life than the picture).

I have been working on the Romanian Point Lace table center (some people were surprised when they saw it that it was bigger than they thought, that is why my hand is in the pictures).

This is the last leaf (the leaves were the hardest to stitch and the ones I hope will look good on the front),

And the last spider web!!
Just a small section left to stitch on a project that I thought would never end!!!

My Romanian Point Lace Tutorial

The talented Jen (from The Quilty Home) is having a giveaway to celebrate her 30th birthday! Check out her fire hula-hooping!

Have a great day and thanks for stopping by!!

Thursday, January 27, 2011

Some BOM's

I decided to join in some Block of the Months this year.

The first one is Granny's Hankie from Justquiltin with Denise Russart.

Here is a picture from her website, the blocks are 16" and the quilt will be 102" square.

I am going to make it with batiks.

Last Saturday I drove around to three different fabric stores trying to find fabric for the background and borders (the appliques will be from fat quarters from my stash). I couldn't find anything I liked.
Later on I was looking online and came across Flare Fabrics.
It is a Canadian company that specializes in batiks!! The fabric was cheaper than any batiks I found locally (even at the discount fabric store), I only had to pay one tax (out of province), shipping in Canada is free (January special of free shipping to the U.S.), plus there is a 10% discount on first orders when you sign up for the e-newsletter!!! What a deal!! The fabric came today and it is beautiful, I can't wait to get started!

The second BOM is from the Electric Quilt Blog.

I made January's block today - it was very quick to make - the blocks are only 6" for this one.
There will be a block a month for the whole year and I have no idea what it will look like. I don't normally like to commit to a mystery project but I thought a 6" block a month wouldn't be a big commitment if I don't like it. You don't have to have EQ for this one, the patterns are also PDF's.

Yesterday I bought these shoes-


they are the kind with the balance ball technology for toning your legs. I originally saw them for over $100, but these were under $50 from Costco. I find in the winter that I don't exercise as much as I should, so I thought they would be great to wear when I clean the house (I tend to vacuum a few times a week, and my children already make fun of my quilting gloves, now they think it is funny that I have vacuuming shoes!). I wore them today when I was cleaning and I could really feel it my legs. Now to see if I can sew with them, so I can "exercise" by walking to the ironing/cutting board!

This picture is from yesterday -there are lots more rabbits this year.

The frost was so pretty today -

early this morning

later on in the day.

The weather is also warmer - the rabbits have their ears up.
They really like pineapples, tops and all!

Have a great day and thanks for stopping by!!

Wednesday, January 26, 2011

Block #14

This weeks block is a "Goose in the Pond" variation (from EQ7).

Normally "Goose in the Pond" has nine-patches in the corner, but I chose to have four-patches in the corner, because the little squares were too little in a 9" block.

This is a quilt I made a few years ago for my youngest child using traditional Goose in the Pond blocks,

with nine-patches in the corner (these blocks are 15").

Linda (from The Quilted Pineapple) is making a beautiful quilt with the same blocks for one of her daughters.

If you want to make the blocks in the traditional way the little squares are 1+1/8", and the strips are 1+1/8" wide for a 9" block.

On with this weeks block!

You will need -

Background -

6 - 2+5/8" square for the half square triangles (HST)
5 - 2+5/16" squares (5/16" is just bigger than the ¼" mark on the ruler)

Print A -

6 - 2+5/8" square for the half square triangles (HST)

Prints B+C -

Cut a strip of each fabric that is 1+3/8" wide. They should be about 21" long, which is about the length of a fat quarter.

With the 2+5/8" squares make twelve HST's (layer a background and print A square, mark a diagonal line and sew ¼" on either side, cut in half along the line and press open...). Trim the HST units to 2+5/16".

Sew the two 1+3/8" strips together along the length and press the seam to one side. Cut 8 - 1+3/8" segments, and 4 - 2+5/16" segments (these 4 units should measure 2+5/16" square).

Sew two 1+3/8"segments together to make 4 - four-patches. They should be 2+5/16" square.
I pressed the center seam open, but it just made for awkward seams later on, so skip that.

All the pieces are now ready to be sewn together,

sewing the units in rows and then sewing the rows together.

Trim the block to 9½".

I made the second one the same way (with some odd fabric).

We are getting close to the end of the blocks - block #20 should be posted on March 2nd if everything goes as planned - so I have been working on the alternating blocks -

the fabric is cut out. I make 12 blocks with the width of fabric. The large quilt needs 41 alternating blocks.

Have a great day and thanks for stopping by!!

Monday, January 24, 2011

Another Mug Rug

I finished another mug rug.

I decided to make this one a bit bigger (10" x 15½"). I made it with squares and triangles that I cut with the new GO! die.

It is fun to watch the rabbits outside. It is amazing to see them eat frozen vegetables sliding on the frozen ground without any hands.

My DH returned to the cold on Friday, after almost two weeks in Southern California -

and brought me back some beautiful fabric from The Quilt Cupboard. He said the ladies were very helpful.

My son also returned on Friday from winter camp (or Camp Bedbug!!!!), so there has been lots of laundry and vacuuming!! Not such a nice present!

Have a great day and thanks for stopping by!!

Friday, January 21, 2011

Machine Quilting

Yesterday I taught a few friends (including my Mother) a machine quitting class.

Every one did very well and it was lots of fun.

Here is my Mom's work.

I have been working on machine quilting a little mat/large mug rug that I made with the pieces I cut with the new GO! Die.

Yesterday morning when I opened the patio door to take a picture of the beautiful full moon -

a rabbit was eating carrots on the deck three feet away -

he didn't even flinch! I could just hear him crunching away. Next time maybe he'll come right inside.

Debbie (of Designs by Debbie and Dixie Too!) is having her first giveaway of a beautiful "I Love Quilting" necklace (I assume the contest closing date is wrong since she just posted the contest yesterday).

I am thrilled to say that my baby is coming home today after three days at winter camp with his school, and that my husband is also coming home today after almost two weeks of being in southern California - I think the -30°C/-20°F temperatures here will be a bit of a shock to him!

I am also very pleased to say the we believe that my SIL will be fine after been found outside on one of the coldest nights of the year - someone was definitely watching over her!

Have a great day and thanks for stopping by!!

Wednesday, January 19, 2011

Block #13

This weeks block is "Monkey Wrench".


It is from the free "Block Fab" App for IPad/IPod.

This free app has 80 different blocks that can be made in any size,

and it can show the blocks in many colourways, and also in combination or paired with another block. It is fun for free, but I was a bit disappointed with the measurements - they weren't very accurate (when I looked online, someone else mentioned this too). The block did work out with a bit of trimming to the little squares.

I chose this block because I wanted something simple this week (after all the triangles last week) and I wanted a block that I could use this large print fabric in (sorry - the colour is off on some of the pictures).

For this one you will need -

Background-

2 - 4½" squares - for the half square triangles (HST) in the corners.
4 - 2+3/8" squares

Print A (mine is the large print)-

2 - 4½" squares - for the half square triangles (HST) in the corners.

Print B (mine is orange dots)-

4 - 2+3/8" squares

Print C (mine is gold)-

1 - 2+3/8" square for the center.

With the larger squares make the four HST (layer two squares, draw a diagonal line, sew ¼" on either side and cut on the line. Press open to the dark fabric). These should be trimmed to 4+1/8".

TIP - I discovered when working with directional fabric, to make the HST with the pattern in the two directions (as shown in the picture).


This keeps all the directional fabric in the same direction when the block is ready for piecing - probably only important to me!

Piece the smaller background squares and print B square as shown.

This is were the problems occurred with the Block Fab measurements. They are too big and need to be trimmed to 4+1/8" in length (I trimmed a bit from both ends to keep it even). Make sure the block will end up being 9½" - I had to trim all the squares by 1/8" because I tend to cut a bit big and sew scant ¼" seams.

All the pieces are ready to be put together in the regular nine-patch method.

Trim the finished block to 9½".

I made the second one the same way - keeping it simple!

Have a great day and thanks for stopping by!!
Related Posts Plugin for WordPress, Blogger...