Thursday, February 10, 2011

Machine Quilting

Today I quilted a lap quilt that my sister made.

The pattern is Friendship Braid (without the borders) from "Jelly Roll Quilts" by Pam and Nicky Lintott. It is made from one jelly roll (Heritage 1846 by Howard Marcus) and measures 43" x 54".
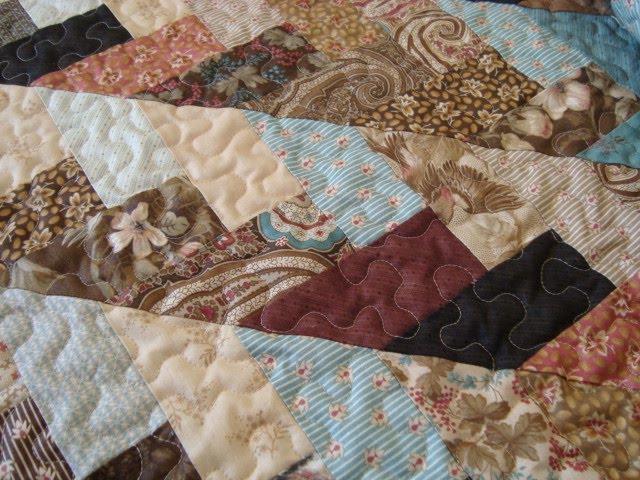
She chose an all over meander pattern and the quilt has wool batting and flannel backing. I quilted it with Aurifi 50wt thread - I started with a beautiful, variegated "Tutti" thread by Wonderfil (also a 50wt thread but thicker than Aurifl 50wt), but it kept breaking and was too frustrating to work with, so I switched to the reliable Aurifil.

This is my set up when I quilt a large quilt - I replace the little plexiglas sewing machine table with an old countertop that my DH made into a sewing machine table - set up on my dining room table - this works great to hold all the weight of a large quilt (the dining room table has been moved to be closer to a plug and so I can see/hear the TV).

The hibiscus had an unusual flower this week.

Have a great day and thanks for stopping by!!♥

Wednesday, February 9, 2011

Block #16

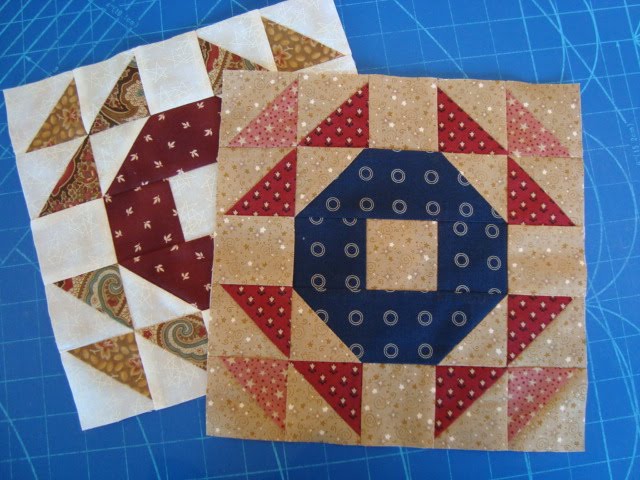
This weeks block is called Wedding Ring.


I chose it because my wedding anniversary is this week.

DH and I, February 11th, 1989

For this block you will need -

Background -

6 - 2+3/4" squares for the half square triangles (HST)
2 - 2+5/8" squares, cut in half on the diagonal
5 - 2+5/16" squares

Print A (mine is burgundy) -

2 - 2+5/16" x 6+5/8" rectangles
2 - 2+5/16" squares

Print B (mine is paisley) -

4 - 2+3/4" squares for the half square triangles (HST)

Print C (mine is dark beige) -

2 - 2+3/4" squares for the half square triangles (HST)


With the 2+3/4" squares (print B and C squares paired with the background squares) make the HST (draw a diagonal line, stitch ¼" on either side, cut on the line and press the units open). Trim the 12 HST to 2+5/16" squares.

Trim the ends of the two 2+5/16" x 6+5/8" rectangles, at a 45° from the bottom.

This might seem a bit more complicated than other blocks - but it works! Thankfully!

Sew the background triangles at the corners. This unit should measure 5+7/8" x 2+5/16".

Sew together the two 2+5/16" print A squares with a 2+5/16" background square as shown.

Sew the three units into a square.

Sew together two HST and a 2+5/16" background square - make two of these units.

Sew them to the center unit.

Sew together the remaining HST and the two remaining 2+5/16" background squares to make the top and bottom rows of the block. Sew them to the center unit.

Trim the block to 9½".

I made the second block the same way.

I was worried about this block because of cutting the corners of the rectangles - so I was thrilled that it worked out!

Have a great day and thanks for stopping by!!♥

Sunday, February 6, 2011

More Alternating Blocks

I finished up all the alternating blocks that I need for the Quilt Along.

All 41 blocks I need for the large quilt (plus 8 extra, because I had strip pieced the width of the fabric).

I finished piecing the Drunkards Path fruit table runner (it is 21" x 42"). I had been using the blocks as a "leaders - enders" when working on other blocks - but I finished it up because I wanted it out of the way. I plan on machine quilting it next week.

Now that the RPL table center is all finished I have switched to hand quilting.
This is the Bear Paw Quilt I plan on finishing as part of Myra's PhD Challenge. I started quilting it almost four years ago, and when I look at it now I realize that I could do much more with it if it was machine quilted!!! Plus it would have been finished by now!

Although the temperature is back down to -20°C, we did have temperatures above freezing a few days ago - now the snow looks like a skating rink. It is amazing how the snow has gone down.

Have a great day and thanks for stopping by!!♥

Friday, February 4, 2011

First February Finish!!

I am so happy to say that the Romanian Point Lace table center is all finished!

Only took me about 21 months!!!! Although I only really started working on it in the past year.
Once it was washed and dried it came out to about 24"/61cm (the pattern was 27"/69cm).


Even the leaves that I was worried about turned out nicely. I used #10 Cebelia (crochet cotton) for this (other details about the pattern are here).

I made the table center for this old table.

I had made this piece of Hardanger about 8 years ago, but I wanted something bigger,

turns out the new lace is only a bit bigger, after all the shrinkage - but I am still very pleased. This is the most amount of time/work that I have ever put into a project!!! My oldest child asked me what the point of it was? I think its main purpose was keeping my hands busy (and out of a chip bag!!) while I watched TV .

If you want to give this beautiful lace technique a try - why not check out my Romanian Point Lace Tutorial.

Have a great day and thanks for stopping by!!♥

Thursday, February 3, 2011

Lasts!!!

Last of the decorative braid attached!!


Last of the wrapped bars wrapped!!


Last of the filling stitches!!

I can't believe it is all stitched!!

Now to remove all the basting stitches and take it off the pattern, wash and block it!!

Have a great day and thanks for stopping by!!♥

Wednesday, February 2, 2011

Another Post Today!!


Today I made my Quilt Along blocks (Block #15)

Here are all the blocks that I have made so far -


56 done, and 25 left to make!!! I am really pleased with how it is coming. It probably would have looked very nice to have the background fabrics matching the alternating squares, but I guess it would be less scrappy.


I also made the EQ Block of the Month - February Frolic.


Here it is with January's block. These are 6" blocks that are quick and simple to make (and you don't need EQ to make them, all the patterns are online - for paper piecing, templates or rotary cutting).

I know I have said this before! But I have to say it again - I LOVE love love seeing all the pictures of the different Quilt Along quilts out there!!! It is great to see the different colour choices, different styles, different sizes........ I thought a quilt along would motivate me to make a quilt, I never imagined that so many of you would be joining in and how thrilling it would be for me!! Thank-You!!♥

Here are a couple of them -

from Joan at Leschenault

from Colleen's "Quilting Journey to Oz"

I have also been visiting One World One Heart participant blogs. It is so much fun to visit different blogs from around the world - so many talented people! If you would like to participate and have a giveaway you have until the 12th of February to post about it on your blog (all the instructions are here), there are already over 700 participants. The giveaways are all on until the 17th of February. Please enter mine.

Have a great day and thanks for stopping by!!♥

Block #15

For this weeks block I chose a variation of a Whirlwind Block that I saw on the Quilt Index.

The original block in the Quilt Index was larger, so with EQ7 I made it a bit simpler.

For this one you will need -

Background -

4 - 2+3/4" squares
1 - 5+11/16" square cut into four on the diagonal

Print A (mine is blue) -

4 - 3+7/16" squares cut into four on the diagonal

Print B (mine is red) -

2 - 3+1/8" squares cut in half on the diagonal

Print C (mine is gold) -

1 - 3+11/16" square

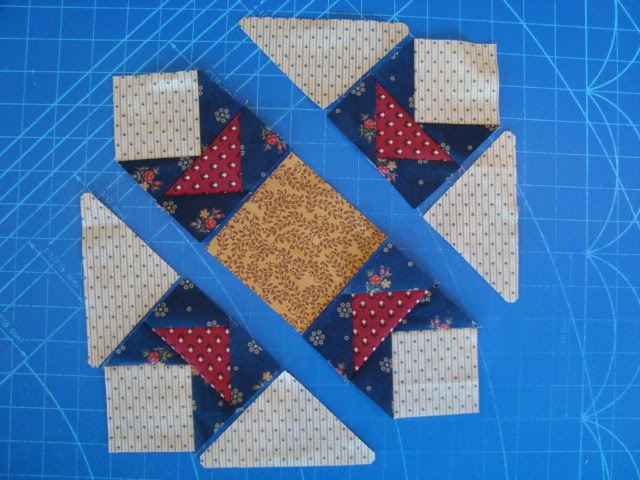
For this week's block there are no quick piecing or short cuts (because the flying geese are on the diagonal in this block, they need to be cut differently than normal) - all the pieces are ready to go (I think this is the first block of the QA like this). I trimmed all the points off the triangles (with my handy-dandy Judy Martin Point Trimmer) - this is not neccesary. This one went together very well - I am always surprised!!

This is how I pieced it -

With the background squares and two of the little triangles (cut from the print A 3+7/16" squares) create four of these corner units. Trim any "dog-ears".

With the print B triangles and the remaining print A triangles create four flying geese units. Trim any "dog-ears".


Stitch a corner unit to a flying geese unit, make four of these units.

TIP -


To maintain the point on the blocks

Stitch the blocks together so that you can see the seams of the point and stitch a couple of threads beyond the point.


Sew the units together like this (two sections with a corner unit and two background triangles, and one section with two corner units and the print C square).

Sew the sections together.

Trim the block to 9½" square (it will be 9" finished).

I made the second one the same way (you could make the center an hour glass or the star points different colours).

Have a great day and thanks for stopping by!!
Related Posts Plugin for WordPress, Blogger...