
Here is my finished quilt.
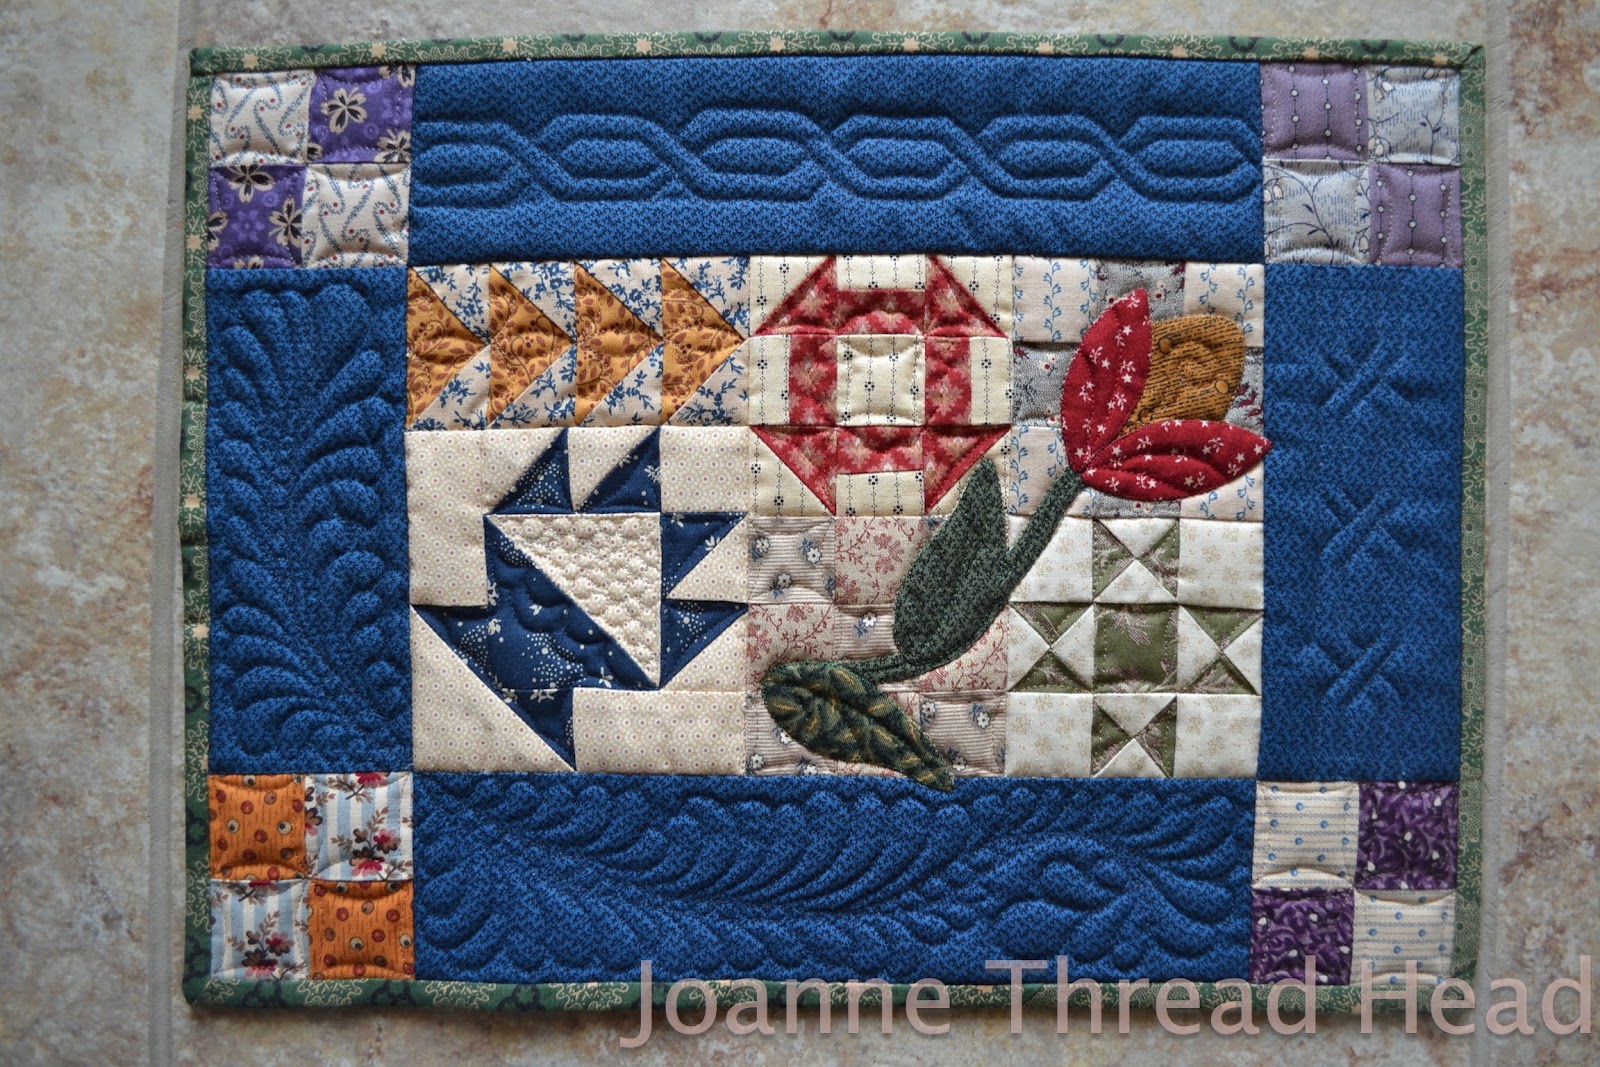


I decided to add a stylized tulip appliqué to the quilt, as tulips are blooming in my garden at the moment.
Add any type of appliqué that you would like, in any appliqué technique (especially if you have a GO! or other fabric cutter, with a flower die).
The appliqué is added before the quilting.

Here is the pattern - you can save the above picture and paste it into what ever program you use to make and print documents. The 2cm scale on the pattern will help make it the right size.
Or you can download this Tulip Appliqué PDF (hopefully this works - it is my first time trying this with Google Docs.).
If all else fails email me and I will send you the PDF.
I used the invisible machine appliqué technique (just like needle turned appliqué by hand, but with the sewing machine) for this quilt. I am not going to go into great detail here, because I have a few tutorials about the technique on my blog already - Mug Rug Tutorial, Crow on Berry Branch Tutorial, and Freezer Paper Appliqué Tutorial.
If you have never tried this technique, it is a great way to appliqué, and this tulip is a simple beginner pattern.
Prepare all the pieces first - 5 pieces with freezer paper, and a 1" bias strip, about 5" long for the stem.

Follow the above picture for placement of the pieces. It is a good idea to lay all the pieces out first to see how they fit (I had some of the pieces going out into the border).
Start by sewing the stem first, the finished stem is 1/4" wide (I used the 1/4" bias bar to make mine). The ends of the stem are covered by other appliqué pieces so you don't have to get fancy with the ends. The middle of the tulips is sewn next. You don't need to stitch around the whole shape, just the part that will be visible and a bit beyond, when it is finished (remember to remove the paper). The leaves and the rest of the tulip are the last to be sewn on.
Layer the quilt with backing and batting. I used a scrap of wool batting, because I like the puffiness - it shows the quilting really well. Foil batting would be good for a mug rug.
Quilt as desired! Famous last words on so many patterns! So here is how I quilted it (picture heavy!).
If you have never machine free motion quilted, now is the time to try - this is a small project and as a sampler quilt it is the time to try new things!
Here is my tutorial on machine quilting (with a video for quilting a feather).
I used 100 weight thread (silk and Invisifil depending on the colour I needed) for all the quilting, but use any thread that you have. I used a #80 Microtex needle.
 |
| A Walking Foot. the little "claw" goes around the needle screw |
 |
| Spring Action Free Motion Foot |
I like to use a spring action free motion quilting foot, and I don't lower the feed dogs when I quilt. I wear quilting gloves, because I find it easier to quilt with- rubber gloves will do if you are starting out. I would say the most essential thing that you need to quilt well is a large work surface, so that the quilt doesn't get caught on the edges. Since this is a little quilt, the Plexi table that so many of us have is enough. Here is a picture of the table that I quilt large quilts on.
 |
| continuous curve quilting |
Continuous curve quilting is stitched just like the name implies - in a continuous line, working around the block, starting and stopping at the same point. You have to work out the path before you start quilting.


 |
| I added some "wiggles" to the CC in the long sections |
 |
| the 9-Patches have CC too |

Before quilting in the corner blocks I stitched on the binding to make sure the continuous curve wouldn't be cut off if I added the binding after quilting. I didn't stitch the binding to the back until all the quilting was finished.
 |
| continuous curves in the corner blocks |

The Basket Block has some continuous curves along with some waves in the basket part. The open section has pebble quilting.

Pebble quilting starts with a figure "8",

and continues filling the area with "8's".

I used a Fleur de Lis design on the Flying Geese blocks.

This is also a continuous design, working from one block to the next,

and working back.

I did some accent quilting designs on the appliqué, using coordinating threads (invisible thread would work too).

For two of the borders I used a stencil (one I had inherited and never tried), and marked it with quilters pounce (a type of "chalk" that irons off).

Free motion quilting a stencil design involves a bit of back-tracking.

Stitch one section (green line),

and back-track to the next section (blue line. With 100 weight thread, back-tracking is barely visible.

Two of the borders I quilted with feathers. Stitching on the binding before quilting allows you to fill in the whole space, especially useful for narrow borders like these.

I tried a "new to me" design with "pearls" down the centre vein.

The vein starts from the bottom and makes the top loop,

back down, the lines cross.

"Pearls" are added by stitching a wave line down the centre,

and mirroring the design the other way.

I really like "Bump-Bump" feathers. They start with the first loop at the bottom,

the second loop comes out in the middle of the space to curve around to the first loop.

It then bump-bumps (back-tracks) and creates another loop.

I find that with bump-bump feathers the loops can be all different sizes, and look more organic.

Before stitching the binding on the back I added 4" squares, folded in half to form triangles, stitched to each corner.

This way the quilt can be hung in any direction with a dowel, and still lays flat to be used for a table mat.

Thanks to every one that quilted along with me. I made this quilt for a friend, and it has been fabulous for me to see everyone else's versions. A true friendship quilt!

Thanks again to every one who participated and shared it on their blogs! ❤
If you make this quilt and would like me to add a picture to this post (especially if you don't have a blog) send me a picture, or let me know if I can take a picture from your blog to add.

