Showing posts with label Log Cabin. Show all posts

Friday, April 26, 2013

Log Cabin Quilt and Spinning

I finished the log cabin quilt!


I have always wanted to make a log cabin quilt and was so pleased to finally have a large enough variety of coordinating fabrics to make one.
The blocks are 7" square, with a 13 by 13 layout (there are 2197 pieces in this quilt!). The "logs" are 1" wide (cut 1+1/2"). The design is an Off Set Barn Raising. It is 91" square. I used silk batting because I wanted it to have an "old-fashioned" look after washing (silk batting shrinks a bit, and wool batting doesn't).


 I quilted feathers in the light sections, and lines in the dark sections.


I used a walking foot with a guide for the lines - they are 1" apart.


I used Genziana thread for all the quilting. It is an Italian thread, very fine, like Aurifil, but available at a local fabric store (I have to order Aurifil online). I have used it before, but this is the first time I quilted a whole quilt with it and I couldn't believe the amount of lint that it generated. It is still a very nice thread to use.


This quilt is for my son's bed. He has a single mattress on an antique bed frame that is between a single and a double bed in size, so it needs a big quilt to hide the frame (there is a big down duvet under the quilt making the bed look big). I chose an off set layout because I didn't want a large "bull's eye" in the centre of the bed.

Last week I said that I had a choice of things to work on, and I did spin some wool before getting to the quilt.


This was the starting fibre bundle - Merino from SweetGeorgia, in the colour-way Tavern.


I split the fibre across the length, and with one section I split it down the length a few times, so that the colour changes would be short. The other half I spun as is, so the colour changes would be long.


Here are the resulting bobbins - the one on the left has the short colour changes and the one on the right has the long changes.


Here is the wool all plied. It came out to 14 wraps per inch, about a DK weight.


I spun the wool to go with some natural Merino I had spun the week before, to make a scarf. This is the "Alex Scarf" from the Craftsy class Explorations in Brioche Knitting. The pattern is so lovely, and just challenging enough to make it very interesting to knit. You can see more of these scarves on the Craftsy project page.


You can see the colour changes on the back of the scarf.


I have some more Merino of the spinning wheel - for this one I am spinning a lace/fingering weight yarn - it will take a long time to spin. This one is also Merino from SweetGeorgia, in a Pomegranate colour way .

Have a great day and thanks for stopping by!

Sunday, February 10, 2013

Log Cabin and Hardanger

I finished piecing a log cabin quilt top.


The blocks are 7", and I chose an off set barn raising layout for them. The quilt top is about 91" square. I used Judy Martin's technique to make the blocks, and it was so easy to piece.

Have you noticed that many people have been making log cabins lately? Barb (Fun with Barb) just finished a lovely one - shown here, and Kathie (Inspired by Antique Quilts) is working on one with 4" blocks that is going to be fantastic.

Fons and Porters has a free E-book on log cabins that is really nice - you download a copy here.


I added a copy to my IPad for easy reading (in iTunes add it to the library from your download file, it goes into PDF's in iBooks - I was only recently shown this feature and love it. I bought Cindy Needham's handbooks and you can enlarge the pictures to see all the details).


I have also been working on a piece of Hardanger that I have had on the go for about 7 years (it is 18" x 29"). I am determined to finish it this year!


Just the cut work sections left.

Come back tomorrow for a giveaway.

Have a great day and thanks for stopping by!

Wednesday, January 9, 2013

First Finishes of 2013

 I finished off a couple of projects that have been sitting around for quite a while.


A piece of tatting and an art doll. The tatting is a pattern that I have made a few times, in different weights of thread - it is such a wonderful pattern. This piece is 12" x 19".  The art doll just needed beads around the edge, she is about 6"tall.


The best finish for the new year is that we finished off a bathroom renovation. I wish I had a before picture - it was pretty sad. The bathroom needed renovating, and a little leak in the bathtub helped us make the move to renovate. I am so pleased! The only original thing is the cabinet, and we did all the work ourselves. This is our sons bathroom.

 This time last year I did some stash busting and made a string quilt, this year is starting the same way.


I cut strips for a log cabin.


Sixty 7" blocks pieced so far. I think I'll need about 150 blocks. The fabric is mostly reproduction.

I am using the Judy Martin technique from her Log Cabin Quilt Book, and it is working well.

Have a great day and thanks for stopping by!

Thursday, December 2, 2010

Finishes and A Recipe

I have a couple of finishes this week.

I finished sewing on the binding of the log cabin table topper.

I decorated my house for Christmas this week and the table topper is a great addition to the decorations.

I also made a tatted snowflake. I used #10 Cebelia and two shuttles, it is almost 5" across. The pattern is motif #17, from DMC's Festive Tatting. It is probably my favorite tatted snow flake pattern.

I wanted to share this delicious recipe for caramel honey pecan bars I made today, . The mixture of honey and cinnamon makes this a really wonderful version of pecan bars. It always wins rave reviews.

It is from this cookbook. I think bars and squares are much easier than cookies (the recipe is on the cover).


Caramel Honey Pecan Bars

Crust -

½ cup pecan halves
2½ cups flour
1 cup cold butter, cubed
1/3 cup granulated sugar
1 egg, beaten

Filling -

3½ cups pecan halves
3/4 cup butter
½ cup honey
3/4 cup packed brown sugar
½ tsp cinnamon
¼ cup whipping (35%) cream

Crust - In a food processor, process pecans until fine. Add flour, butter, sugar and egg (I don't beat it before, although the recipe calls for it, and it works fine). Process until mixture resembles coarse crumbs. Press evenly into a greased jelly roll pan (15" x 10" x 1" pan). Bake in 350°F preheated oven, until edges are lightly browned, 12 to 15 minutes.

Filling - Sprinkle pecan halves evenly over hot crust (you can make the bars more attractive by turning all the pecans right side up). Set aside. In a large, heavy saucepan melt butter and honey. Add brown sugar and cinnamon, and boil, stirring constantly until mixture is a rich caramel colour, 5 to 7 minutes. Remove from heat. Stir in whipping cream, mixing well (be very careful of the steam created). Pour evenly over pecans.
Return to oven and bake until top is bubbly, about 15 minutes. Let cool completely in pan on rack. Cut into bars (40-48 bars). The bars freeze well.

Have a great day and thanks for stopping by!!

Monday, November 29, 2010

My "Baby" is Back!

Finally my sewing machine came home today! The problem is fixed for now - I was told that they don't know what happened and it will probably happen again. I am just thrilled to have it back after over a week. Sewing on my old machine reminded me why I replaced it.

I am back to machine quilting! I just have to finish sewing the binding on this Christmas log cabin table topper.

I free motion quilted a holly and swirl all over design.

With a coordinating design for the border. I used Invasifil for the top and Aurifil 50 for the bobbin, with a #70 Microtex needle.

Over at Jo's Country Junction , she kindly mentions my quilt along, mentioning that she wished she was doing an online quilt along instead of her LQS' BOM. She said that she always spends more money when she goes in to pick up her BOM. I had never thought of this - but when I went to pick up my sewing machine today, I did come home with some extra thread!! Glad I don't belong to my LQS' BOM. ☺

I had a surprise the other day when I went to check on my plants in the basement under grow lights - a succulent was blooming! I have had this plant for a number of years and this is the first time it has bloomed. The flower was a least 8" across - but it smelled like something had died!!

Back to my sewing machine!!
Have a great day and thanks for stopping by!!

Sunday, November 21, 2010

Log Cabin Table Topper

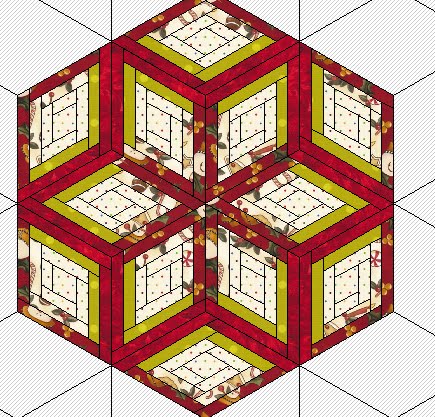
I finished piecing a Christmas table topper today.


I used leftover Figgy Pudding fabric from the Arrowhead quilt. I thought I would have enough fabric to make the log cabin blocks bigger, but I was wrong! I wanted it to be a specific size to fit on a round table and I only had a big enough piece of white fabric leftover. So I added a border around the whole piece - it is like it is laying on snow!

This kind of log cabin block is very easy. The key is the center piece.

For this one I started with a 2" strip of fabric. Once the first 60° angle is cut,

you cut 2" pieces (or what ever size the strip was cut) parallel to the 60° cut.


The log cabin is pieced around the center like a normal log cabin block. I used 1¼" strips, 2 strips on each side of the center. The border is cut 3½" and the table topper is 29" point to point.


For this tree skirt I made a while ago, I used a 2¼" piece for the center and 1½" strips for the logs, with 4 strips on each side of the center. It is 46" point to point.

I also entered the tree skirt into Paula's Sewing Challenges.

Back to the star design - you will need 12 log cabin blocks to make a star, 6 pieced like this-


and 6 like this -

These ones are added in after the other blocks are sewn into the star shape, using a Y seam.

Even mitering the border is the same as normal but using the 60° line on the ruler instead of the 45°.

It is designed using the EQ6/EQ7.

It is using the one block quilt - baby block.
Placing the log cabin blocks in,
it is easy to rotate the blocks for different layouts.

I also added all the buttons to the crazy quilt piece, it is now ready to be sewn into the finished piece.
My sewing machine had to go in for repairs!!! It was clunking! I brought out my old one to finish piecing, it is like using a toy sewing machine. At least I have a spare machine - I was originally going to sell it - glad I didn't.


We had more snow today, beautiful big flakes -

when the sun came out everything was sparkly.
I live just out side of Winnipeg, and I recently found out that it is the coldest major city (with a population over 600,000) in the world !!!

Have a great day and thanks for stopping by!!

Tuesday, October 5, 2010

What to Do?

I have recently finished machine quilting the three lap quilts I had to finish (plus another one for my Mother) and a couple of little projects for fall decorations, now what should I work on?


This is (I hate to say it) my oldest UFO! I made it over 10 years ago when I was starting quilting. It is 20" x 41". My neighbor had given me the scraps of fabric and I had borrowed a log cabin book from a friend -


I just tried out a few different styles from the book and put them together. The strips are 1" finished. The fabric is very pale and I have no real use for it (not that this usually stops me!) so I never got around to finishing it. I could just machine quilt it and get it finished, but that doesn't seem to appeal to me!

Here is another project that I would like to make -


It is a free project from Kaaren at The Painted Quilt, it is the Huswif Needlecase.
I like the over all idea, but I am planning on making a simpler version as a give away door prize for a quilt show.
I was going to eliminate the beautiful embroidery on the inside -

and make it a bit smaller.

I am also thinking a making a few little quilt blocks for either pincushions or pot holders (again for door prizes).

It is getting late so I'll see what I fell like doing tomorrow!! Hopefully I don't have new ideas!!


I thought I would add this picture (although it was prettier in person - more iridescent). It is woven carbon fibers on the exhaust pipe of my son's new motorcycle (don't tell him I used the word "pretty").

And red my favorite colour too!

Have a great day and thanks for stopping by!!
Related Posts Plugin for WordPress, Blogger...