Sunday, December 16, 2012

A Year of Small Quilts

In April a blogging friend told me about Kathleen Tracy's  (A Sentimental Quilter) small quilt group and I was so pleased to join. For 2012 the challenge was to make a small quilt a month from one of Kathy's patterns - it was fun waiting to see which one Kathy would choose for each month.


The year is coming to the end and here are all twelve of my small quilts.

All the patterns are from Kathleen Tracy, either one of her free patterns or from one of her lovely books. Click on the month to link to my blog post about the quilt.

January -


February -


March -


April -


May -


 June -


July -


August -


September -


October -


 November -


Last but not least December -


 This one is 17" square, and from the book "Remembering Adelia".


I used cotton batting and the quilting is done with 100Wt Invisafil thread. I really like how it turned out and it makes a nice addition to my Christmas decorations.

Thanks so much to Kathy for all her wonderful patterns and inspiration - it has been such fun!

Have a great day and thanks for stopping by!

Friday, December 14, 2012

A New Hobby!

A couple of weeks ago when Craftsy had most of their classes at 50% off, I bought a couple of ones that interested me. I love the Craftsy platform, a class is about the same price as a book, but because questions are constantly being asked and answered, and people are posting their projects from the class, it is always evolving and expanding unlike a book. I am a visual learner, and it is wonderful actually having someone demonstrate what to do. Plus with Craftsy you have access forever, unlike some other online classes. (I am not paid or compensated to express my opinion!) 
I bought The Art of Cloth Dyeing and Artisan Bread Making.


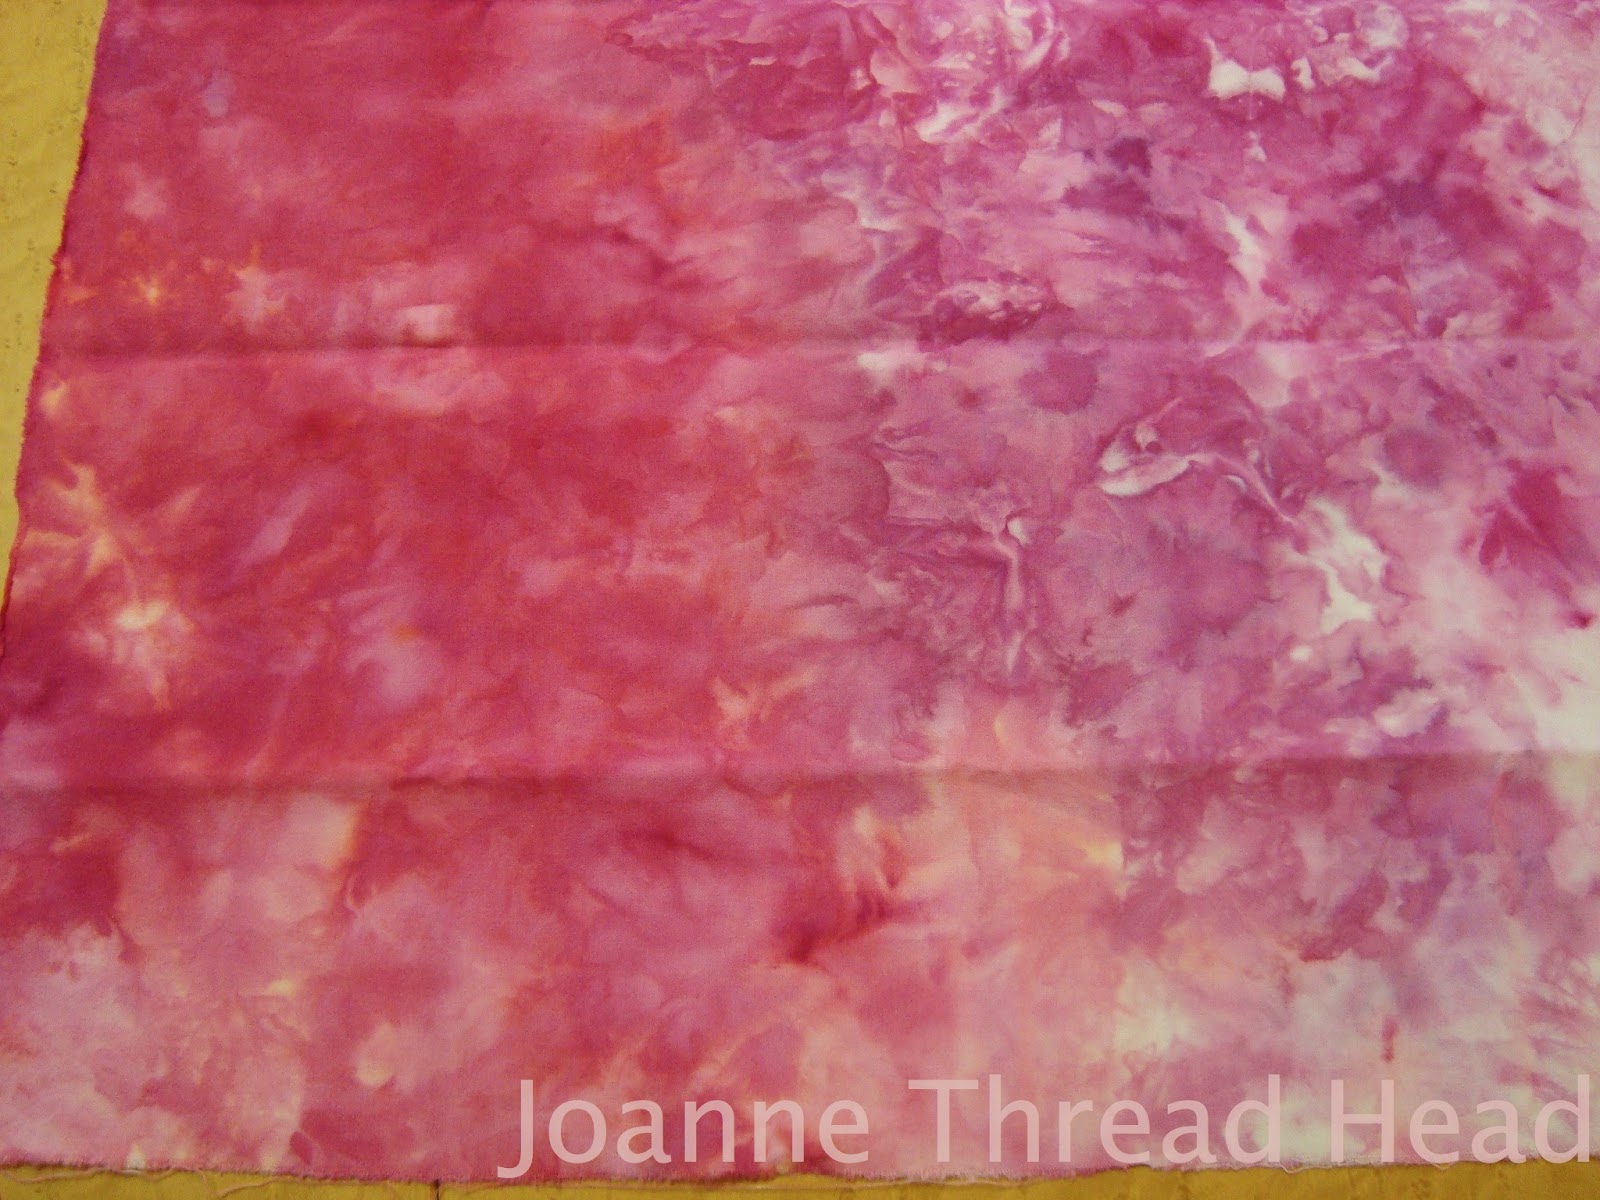
You will not notice any delicious baking bread smells from my kitchen, but almost 8 metres of fabric, plus cotton yarn and pearl cotton, have been dyed since Saturday! This is the result of 3 different dyeing days this week. I used Procion MX dyes.


For the above group, except for the yellow, I mixed different colours and poured them onto the fabric, which was loosely scrunched into an old plastic container. Some of them I poured one colour on one side of the container and another on the other side. Except for one of the fabrics, all were dry when I put them in the container.


The above two are made from yellow and red, poured on opposite sides of the container, but for the top one the fabric was dry, and for the bottom one the fabric was wet, and had been soaked in a solution of water, salt and soda ash.


This group of fabrics were dyed using Melody Johnson's Lazy Dyer Solids method - I love the results, and can't wait to try a few projects with these. I did wring out most of the dye solution before placing the fabric in the bag, because I wanted the fabric to be more even.


This group were snow dyed (one is missing because I couldn't wait to try it out). I learned pretty quickly that I can't snow dye the same way I have seen others on the web doing it, by pouring the dye solution right on the snow (the liquid just made a hole right through the snow). We have dry, fluffy snow, that doesn't really pack (no snowmen here) -


but it is great for shovelling, which I have been doing a lot of lately! So it is nice to be able to put the snow to good use.
Kathy (Tamarack Shack) had the best advice for snow dyeing for our climate, she told me to mix the dye directly with the snow (she has an example here) - thanks Kathy! I also sprinkled the dye powder onto the snow - both methods worked well. The fabrics were soaked in the water/salt/soda ash solution first.


The dye mixed into the snow resulted in brighter colours - the top three in the above photo of all the snow dyed fabric were created that way (I used the dyes straight from the container for the top three because I wanted to see if the colours separated - the colours from the top are carmine red, fuchsia and deep purple - the red and purple separated into other colours).


This is an area of the purple to show the colours that came out.


This one is fuchsia and yellow sprinkled on the snow. Snow dyeing creates a beautiful "blossoming" effect.


Pouring dye solutions on dry fabric also results in beautiful effects - this one was made from orange and fuchsia poured separately. It is so interesting to see how the colours separate and settle.


I also dyed some white pearl cotton #5 (the bottom one was made from yellow, black and purple - I recently learned that yellow and black make olive green - who knew!),


 and some leftover white knitting cotton.


To dye the thread and yarn, I soaked small hanks in a hot water, salt and soda ash solution for an hour, and then place them on an old plastic lid with some of the solution. I added a tiny bit of dye powder directly on the cotton, and mixed it with my finger, pressing it into the cotton. I covered the lid with plastic wrap (making sure that the wrap was within the sides of the lid, so that the liquid wouldn't wick out).


The hardest part of dyeing was waiting 24 hours for everything to "batch" (everything was in the warmest room in my house - luckily my laundry room with a sink, with a seed germinating mat underneath, and covered with an old towel).

My opinion of The Art of Cloth Dyeing Craftsy Class - Jane Dunnewold is a fabulous teacher! I really came away with the feeling that I knew why I had to do all the steps, and what all the dyeing chemicals were about. She also talked about different manipulations of the fabric, and had lots of examples of the results. Now when I look at other dyeing sources on the web, I know I can adapt them to use the method that Jane taught.
I didn't really try different manipulations this time, because I wanted to experiment with colours.
In the late 80's I tie -dyed clothes, and dyeing seems to be much easier now. I am so pleased that I bought the class.

Have a great day and thanks for stopping by!

Thursday, December 13, 2012

FMQ Bonus Tutorial

I decided I would work on a few of the SewCalGal  FMQ bonus tutorials before the end of the year.
The first one I tried was the one by Susan Brubaker Knapp, from August.


It was all about taking a photo and turning it into a quilt design.


I used a wonderful tutorial from LuAnn Kessi (May Your Bobbin Always Be Full - such a great blog and tips on so many creative things) on how to transform photos into drawings with Photoshop - the tutorial is here. You can see my pattern in the corner of the above photo. I used a light table, and transferred the design to the fabric with a very fine pencil (I used a fabric eraser to remove the lines after stitching).


This is the finished piece. It was lots of fun to stitch. This was the first time I have created something like this, and it was much easier than I thought it would be - I will definitely have to try it again.
The piece is about 9" x 10". I used 100Wt Invisafil thread for all the quilting. The batting is my now favourite, layer of cotton with a half layer of wool on top.
Thanks SewCalGal and Susan BK!!


For this piece I used some fabric that I snow dyed - I thought my summer flower should be immortalized on my new winter hobby! More about my new addiction hobby another day, I have some fabric waiting to be washed out!!

Have a great day and thanks for stopping by!

Tuesday, December 11, 2012

THQA 2012 Quilt Settings

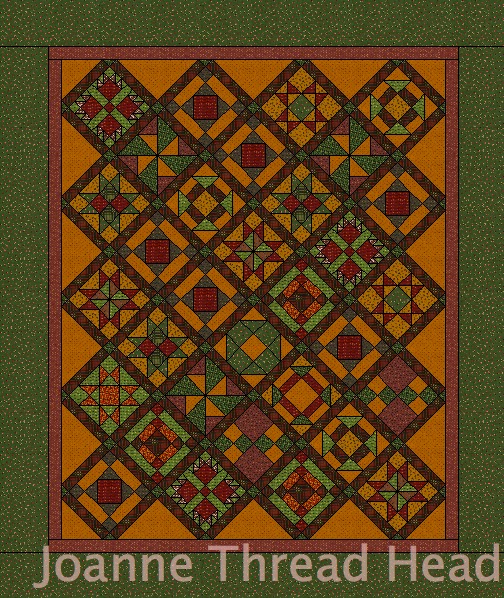
Now comes the fun part - what to create with all your blocks! There are links to more ideas and another layout option at the end of the post.


This is the layout I chose (thanks for telling me how to create this with EQ7 Raewyn!).
I did decide to use alternating colours for the zig-zag rows.

Here are the steps involved -


The triangles that make up the zig-zags are made from a 11+1/8" square that is cut into quarters on the diagonal. It is important to cut the triangles like this so that the rows don't have bias along the long edge
For 42" wide fabric you can get 3 squares per 11+1/8" strip. I used 4 strips of red and 3 strips of green, but I think you would only need 6 strips if all your triangles are the same (hopefully my math is correct).


The little triangles in the corners at the end of rows with whole blocks are made from a 5+7/8" square that is cut in half on the diagonal. I used 4 red squares and 2 green squares, so 6 squares if you are using one colour.


All the blocks, half blocks and setting triangles are laid out as shown in the above photo.
I have to admit that all the blocks are supposed to be trimmed to 7+1/2" squares, but not all my blocks were that big (I had a new 1/4" sewing foot that I struggled to find the "sweet spot" for, and my blocks ended up different sizes) - this layout was wonderful and I had no problem getting it all to fit. I assume it was because of the bias edges on the triangles.

Start by sewing rows.


Sew triangles to opposite sides of a block first.


It is easier to start sewing at the right angle of the triangle, because it lines up with the edges of the block.


Press the seam allowance to the triangle and trim off the little point.


With seams pressed in the opposite directions, you should be able to get nicely matched points when sewing the block and two triangle units together


Once all the rows are sewn, they are ready to be joined together. You can mark the centre of the triangle with a pin to make sure that it lines up with the corner of a block in the adjoining row - I did this at first, but found that it worked out fine all the same. I did pin the rows before sewing them together. Press the seams of the rows to one side or open the seams - whatever works for you (I prefer to press the seams to one side).


The finished quilt top! It is 50" x 70".

If you don't chose this quilt setting, there are all kinds of other possibilities of what to create with your quilt blocks. There are some ideas shown on the original quilt along post - shown here, and I made a Pinterest board with other ideas I found on Pinterest - shown here (I love Pinterest and waste a lot of time use it all the time - the pins I have are either repined from someone else, or I have asked permission to pin a picture - if there is a picture that is on one of my boards, and it is not supposed to be on Pinterest, please let me know and I will remove it.). When I was getting ready for this quilt along I couldn't find any reference pictures for zig-zag settings, I am pleased that now I have found quite a few.

Sophie asked me to try out the following setting for her fabulous blocks -


sorry Sophie that I didn't change the colour of the quilt to reflect your blocks

This quilt would work out to be about 60" x 71" - using 1" sashing, and borders that are 1.5" and 6". The above picture has sashing strips that are 1.5", and the quilt would be slightly bigger. EQ called for less that a yard of fabric for the sashing and 2 yards of fabric for the outer border (I find that EQ does tend to overestimate fabric requirements). The triangles along the edges, and the ones in the corners would be the same size as the ones in the setting I chose.

If you would like any help with measurements for a setting you would like, don't hesitate to ask me (my email is found here).

Next week I will talk about quilting your quilt. I will have a few different suggestions and some tips, plus my finished quilt.

Thanks for quilting along!

Friday, December 7, 2012

'Sew' Much Fun

I made this piece of crazy quilting a few years ago and thought that is was about time I made some thing with it (I originally had other plans for it and never got around to making it).


The crazy quilting measures about 6" square.
The tatting patterns are from the book "Tatted Fashion" by Teiko Fujito - which is a wonderful book and great for all levels of tatters.
Since I have been doing lots of free motion quilting recently, and I purchased some different plain Kona cotton to practice on, I decided to incorporate the CQ into a whole cloth quilt.

Here are the steps I took -


After adding large borders to the square of CQ, I layered it with backing fabric (from an old white cotton sheet), and two layers of batting - the bottom one is cotton and the top is half a layer of wool batting (both by Hobbs - just what I had). Stitched all the seams in the ditch. I did mark the spines of the feathers with a white Clover iron out pen and stitched those first. More about the design inspiration later.


After all the feathers were stitched, I knew I wanted to have a large section of a palm leaf design in the corner (Cindy Needham calls it "gingko", and uses a stencil, but I quilt a different ginkgo design already and think this one looks more like a palm leaf - so to avoid confusion I am calling it a palm leaf design).


I marked two semi circles with a Hera marker on a piece of string, that I held at the corner.


There is pebbling quilted in the narrow band,


and "scribbling" in the section around the CQ. Scribbling is as fun to quilt as it sounds!


I marked a 1/2" grid with a Hera marker for the palm leaf design (you can see how well the lines show up - the Hera marker just flattens the fibres. To remove any lines that were still visible after quilting, I sprayed a tiny bit of water on the fabric to swell the fibres back up - my fabric is cotton).


This area (about 11" radius) took almost 4 hours to quilt!! The whole FMQ took about 9-10 hours.


But it was worth it in the end - I love the movement this particular design creates.


When I started this piece I knew that I wanted the quilting to move around the CQ, from the bottom left corner (the lone button), around, and "out" the upper right corner. I added diagonal straight lines around the rest of the feathers to create more of that movement. There is also a section of binding that is different in the upper corner (it is the same Liberty cotton that is in the CQ), and the CQ is purposely not centred in the piece.

this photo shows all the different designs

I added beads to the palm leaf design, in different colours and sizes (11 and 15) to create more movement.
All the quilting is done with a matching dark beige Invisafil 100Wt thread. The feathers are bump-bump feathers, and I used a #80 Titanium needle (still the same one that has been on my machine for ever it seems, well worth the extra money).

Before I started the piece I knew that I wanted to practice a few design elements - the palm leaves and feathers with triangular elements.


The above photo shows the triangular elements in the feathers and how they mimic the triangle shapes of the CQ. There are more triangles in the piece created with other designs and beads.
The semi circle in the upper corner and the pebbling mimic the buttons and beads in the CQ.

the finished piece is 19"x20"
I can't tell you how many times I took the above photo and there were always blurry sections - the joys of a point and shoot camera, but at least I am still blogging for free!

The Cindy Needham Craftsy online class that I took really helped show the importance of backgrounds, and it has been fun trying out different ones. Thanks so much to Cindy Needham!!
More of my opinion of the class here.

Practice, practice, practice - the only way to get better at free motion quilting! My Mother asked me what I was making this for - once it was finished it served its purpose - it was to practice. I don't know why, but you do a better job practicing on something that is worth while, than just an old scrap of fabric.


I just wanted to mention that I quilted it the ditch first with a walking foot, in all the seams. After the piece was quilted I found that I didn't like the areas of the feathers that were stitched down and I removed some stitching. In the above photo you can see the feather on the right side of the spine (the large lobe) has had the stitches in the ditch removed, and the ones on the left haven't.

I hope this inspires you to practice!

Have a great day and thanks for stopping by!
Related Posts Plugin for WordPress, Blogger...