Tuesday, February 7, 2017

Valentine Mug Rug Tutorial

This is the next in my series of Mug Rug tutorials - perfect for Valentines Day or a Wedding Anniversary (like mine - our anniversary is in less than a week - my husband asked if this was his anniversary present).


This is using the hexagon shaped mug rug base from another tutorial (I said I would be having more tutorials for that shape) - Hexagon Shaped Mug Rug Tutorial.
I used a 5" radius for this hexagon, the finished mug rug is 10" point to point and about 8.5" straight edge to straight edge.

This is the most simple appliqué, and any size or shape base will work.

I used the invisible machine appliqué technique (my tutorial can be found here), but your favourite  appliqué method will work.
I have learned that the invisible machine appliqué technique stands up to repeated washings and scrubbings, which can't be said for every appliqué technique - this is a mug rug after all, and tends to get spilled on.


To make a mug rug like mine you will need about a 11" square of background fabric, 1.5" strips of fabric for the binding (2 strips across the width of a fat quarter worked for me), and a few assorted scraps of fabric for the appliqué. As well as the invisible machine appliqué necessities  - freezer paper (from the grocery store), glue stick glue (just paper one is fine), Roxanne Glue Baste or liquid white glue,


100wt thread to match the appliqué fabric (I used Invisafil by Wonderfil), or polyester invisible thread.


I cut out the background fabric slightly larger than the finished shaped to allow for any shrinkage during machine quilting.


For the Appliqué -


I cut out heart shapes from 2 pieces of 4" square freezer paper folded in half (mine were cut out at the same time, but different shaped hearts would be nice too).


I also cut out 3 freezer paper circles - I drew out one circle on the freezer paper, it is about 1" (traced around an old spool, a coin, a circle template...), stapled it together with two other pieces of freezer paper and cut out 3 matching circles.


I glued the freezer paper shapes, waxy/shiny side up to the wrong side of the fabric, using glue stick and cut out a 1/4 seam allowance (on the bigger side of 1/4" for me).

Preparation of the Appliqué Pieces -

This is the most important part of the process, and really effects how the finished product will look.


The seam allowance for the appliqué needs to be pressed to the waxy side of the freezer paper, so I like to baste a little gathering stitch around any curves - tiny stitches make smoother curves.


I stitched around the curves on the hearts and all the circles.

I use the tip of a hot iron, with no steam, to press the seam allowances, and a pressing board that is very hard (no padding).


I like to press the points first,


add a bit of glue stick glue,


and fold the rest of the point to create a crisp corner.


The top of the heart needs to be clipped almost to the paper. Extra machine stitches should be added in this area too when attaching the appliqué to the background.


For the circles I like to pull the gathering stitches tight,


press the opposite side from the gathering thread ends,


and then press all around the circle.


Make sure to clip the gathering thread ends so they don't get caught and pull the seam allowance off the wax.

Now comes the fun part of deciding how you want the mug rug to look -


Once you decide glue the pieces to the background with small dots of liquid glue (Glue Baste). If any pieces overlap the bottom ones will need to be stitched down first and the paper removed before adding the next piece. I opted for a simple one layer of appliqué, and glued all the pieces at once.


I pinned the hearts first and lifted the edges to add the glue.


The circles were easier to glue.


Once everything is glued, I like to weight it down to set while I get my sewing machine ready.


This technique uses a very small zig-zag stitch - I use a shorter than normal stitch length and just 'off the straight' for the stitch width. The tension is also adjusted (loosened I believe) so that the top thread is drawn slightly to the bottom.


Especially with 100 weight thread, the stitches really do become invisible.


I use an open toe embroidery foot. The bobbin thread is just regular sewing machine thread to match the background.


Once all the stitching is complete,


the fabric behind the appliqué needs to be cut out, leaving a large 1/4" seam allowance.


Then the freezer paper can be removed (tweezers help with the little pieces).


I like to use a bit of spray starch for the final pressing, and the pieces is ready for embellishment.

I decided to add some decorative machine stitching around the hearts just because I never use those stitches.


Since I decided to add a bit of machine embroidery around the hearts I added a bit of interfacing on the back as a stabilizer.


I used a heavy weight variegated thread and a top stitching needle in the machine.


After stitching I cut away all the interfacing in the back because I did not want it to affect the quilting.


For the free motion machine quilting I outlined the shapes, chose parallel lines (straight and curved) for the bulk of the quilting and swirls in the circles. I always like to try something new for a project and since I struggle to use striped fabric I decided to use some for a heart - I really like how it looks after quilting (and I learned that I really can't follow lines!).

I used 100wt thread (Invisafil) for the quilting, and 2 layers of batting (one silk and one wool because that is what I have scraps of). With heavy quilting it came out nice and flat.


After quilting I cut the shape out and applied the 1.5" binding as shown in the hexagon shaped mug rug tutorial.


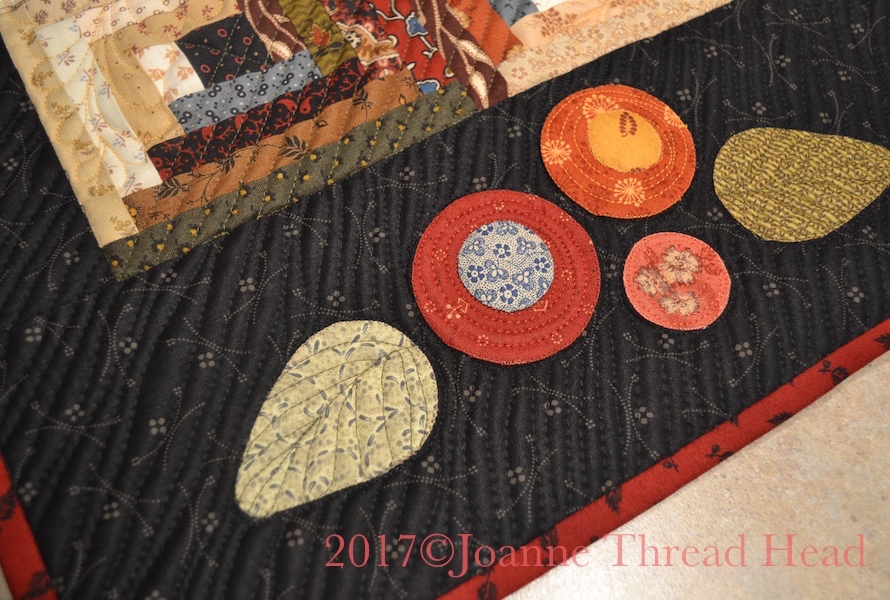
My Mother made a log cabin table mat from my last tutorial! With simple walking foot quilting and no appliqué it looks beautiful.

Have a great day and thanks for stopping by!♥︎

Friday, February 3, 2017

Circa 2016 Medallion Quilt

I finished my Circa 2016 Medallion Quilt!


The centre section was the Temecula Quilt Company's quilt-along-quilt for last year.


I added more borders to make is a bed sized quilt. It is 84"x95" (it's on a double bed).


This is quilted on my domestic sewing machine - I used a walking foot to stitch in the ditch around all the borders, and a spring action free motion foot for the rest of the quilting. I used Hobbs Tuscany Wool batting. The quilting was done with Aurifil 50wt thread, and Bottom Line 60wt thread.

It's probably just me but I always wondered how medallion quilts were made - how did quilter get the pieced borders to be the right size? Now I know all about 'Filler Borders', that is the secret to making a medallion quilt - plain fabric fills the space between the different sized pieced borders (a couple of mine are the same background fabric, and a few are a contrasting fabric). There is a bit of simple math involved in calculating the size of the filler borders.


Because the quilt is a rectangle the side filler borders are not the same size as the top/bottom filler borders.

When I was deciding on what borders to add to the quilt I chose to repeat some of the designs from the original centre section -


The Court House Steps blocks are laid out similar to the centre Hour Glass blocks-


The Sawtooth blocks are a repeat of one the centre blocks-


I had always wanted to make a Medallion Quilt, and I learned a lot with this quilt. It was a fun challenge!

I had a few more knitting finishes this week -


A hat and cowl made with yarn from Tanis Fibre Arts. The hat is a free Ravelry Pattern - Lake Reed, and the cowl was made using a cable chart from a Japanese knitting book my son brought me back from Japan.


This year my Mother and I decided to join the Tanis Fiber Arts 2017 Year in Colour Club, and this hat was the January pattern (Heira) and yarn. A quick knit with lovely merino and alpaca bulky yarn - you have to imagine that the leftover ball of yarn is a pom-pom, that I will make when I figure out exactly how to make one.

Luckily I live somewhere with 6 months of winter!


This is what is on my needles now, I am glad to be back knitting with hand spun.

Have a great day and thanks for stopping by!♥︎

Sunday, January 29, 2017

Westering Women BOM


Today I finished sewing the last blocks for the Westering Women BOM from Barbara Brackman, on the Civil War Quilts blog.


This is the November block - Bear's Paw.


This one is the December block - Road to California.


I even finished putting together the quilt top!
I decided that I wanted the quilt to be a bit smaller (to fit a 60" wide plush backing I have), so I used 2" sashing and 5" for the outer border. The quilt top is 54"x68". The blocks are 12".
The patterns for this BOM will only be available online for a few more months, then they will be a paid pattern. The new block of the month (Yankee Diary) started this week on the Civil War Quilts blog, so now I can start that one, but first I need to finish quilting my Medallion quilt.


Lately I have been working on appliqué because yesterday I taught an appliqué class to a local quilt group - I thought every one did so well, I had such a good time and met such wonderful ladies.

Thanks for stopping by and have a great day!

Friday, January 27, 2017

Another Table Mat!

This week I made a table mat, and thought I would share the process in case some one wanted to make something similar.


This has pieced Log Cabin blocks and simple appliqué. 


It is about 14"x25" - the centre is 10"x15" using six 5" blocks.


The 5" Log Cabins are made up of 1" strips and are a great way to use up small pieces of fabric (I got out my bowl of leftover pieces of fabric).


To make things easier for myself I place masking tape labels on the the cutting table to make sure I cut out all the pieces I need.

Log cabin blocks are my favourite to make (I love the cutting, the piecing, the different ways they can be laid out....).
I am slowly learning that they look best with a strong contrast in light and dark, also with a good mix of print sizes (scale of the print), with some odd 'zingers' of fabric thrown in for fun (someone wise once told me that if I didn't like a fabric it was because I hadn't cut it into small enough pieces - this is the perfect time to use odd fabric).

These blocks have 1/2" finished 'Logs' with 1" finished centres. Cut the strips parallel to the selvage (if you are using scraps you can snap the piece and it should make a slight 'ping' noise and have little/no stretch). Some people like to make Log Cabins without pre-cutting all the pieces, but I find it easier to have them all pre-cut.

For each 5" Log Cabin Block Cut -

1+1/2 square for the centre (all mine are the same fabric).
The logs are made with 1" cut strips, cut to the following lengths -
           1+1/2" light only, for the following both light and dark are needed - 2" , 2+1/2", 3",
           3+1/2", 4", 4+1/2", 5", and from the dark only 5+1/2".

Cut out 6 of each size for the 6 blocks.

If you wanted to have the centres cut to 1" like the Logs, then decrease all the strip lengths by 1/2" and the finished block will measure 4+1/2".


I like this Creative Grids ruler for cutting out the Logs.


The pieces will be chain pieced in this order.


Chain piecing in progress.


When I was cutting out the fabric I tried to only use the same fabric just once or twice, because there were only 6 blocks I laid out the strips I was going to use before sewing to make sure one block didn't use the same fabric twice.


Once all the blocks were finished I sewed them together in a Fields and Furrows layout - there are other options for layouts, especially if you have more blocks.

I wanted a long and narrow table mat for my coffee table so added uneven borders -


2+1/2' and 5+1/2" borders for mine,


It would be great with even borders too.

For the appliqué I used my favourite invisible machine appliqué technique - link to my tutorial.


I opted for simple circle appliqué pieces (this is a handy circle template from an office supply store), traced straight on to some freezer paper. I used 2+1/4", 2" and 1+1/4" circles with a couple smaller ones for the flower centres.


For the leaves I used a circle (1+3/4") with a V added to shape it into a leaf.


All the leaves were the same size, so I only drew out one, stapled it to a few layers of freezer  paper and cut them all out together -


This worked the same for the circles.


To make things easier when pressing the fabric to the freezer paper I basted around the shapes with a small running stitch to gather the seam allowance evenly to the shape.


 The appliqué pieces all ready for stitching.


Now comes the fun part of deciding how all the pieces will go.


I chose a simple layout in the large side border.


Stitched down the first layer,


cut the backing and removed the paper,


 before adding the next layer of pieces.


For the appliqué stitching I used Invisafil by Wonderfil thread - a 100wt thread that blends beautifully,


and really becomes invisible.


I have made quite a few quilted items with this appliqué technique, and am amazed how well it stands up to lots of use and washing - the fabric has shown signs of wear with no change to the appliqué stitching.


I used Aurifil 50wt thread top and bobbin for the free motion quilting. Parallel lines in the dark sections of the blocks, and feathers in the light sections of the blocks. A chose a wavy 'parallel' line for the borders. Embellished the leaves with 'veins' and stitched spirals in the flowers. Since this is a table mat I like a lot of stitching to make sure that is flat so mugs and glasses aren't tippy on it. I used 2 layers of batting (this time one silk and one cotton, just because I had the right size leftover pieces).


More Log Cabins on the couch, well one is a Courthouse Steps, but close enough.

If you decide to make something similar please send me a picture so I can share it here.


This is my Mother's version - no appliqué and simple walking foot quilting.

Thanks for stopping by and have a great day!
Related Posts Plugin for WordPress, Blogger...