

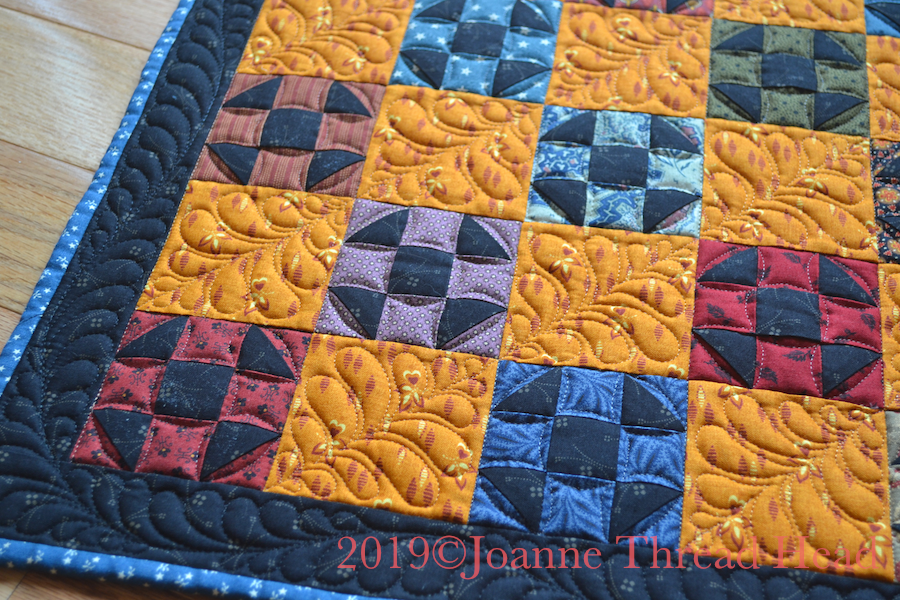
This is a Shoo Fly mini quilt with 3" blocks. It is 18"x24". It is a 5 by 7 block layout.
I chose a Shoo Fly block because it is a simple block that I think works well for such a small block.
For each 3" Shoo Fly block you need -
Print A -1 - 1+1/2" square (centre of the block)
2 - 2" squares (for the half square triangles)
Print B - 4 - 1+1/2" squares
2 - 2" squares (for the half square triangles)
For this quilt you need 18 Shoo Fly blocks.

I used all the same black fabric for Print A, and 18 different fabrics for Print B. This is a great way to use up scraps of fabric. It is also fat-quarter friendly - I used the same black fat-quarter for the centre of the blocks and the border (my fat quarter was a metric one though, so a bit larger than one based on a yard).
I sewed all the half square triangles at once using this method - link.
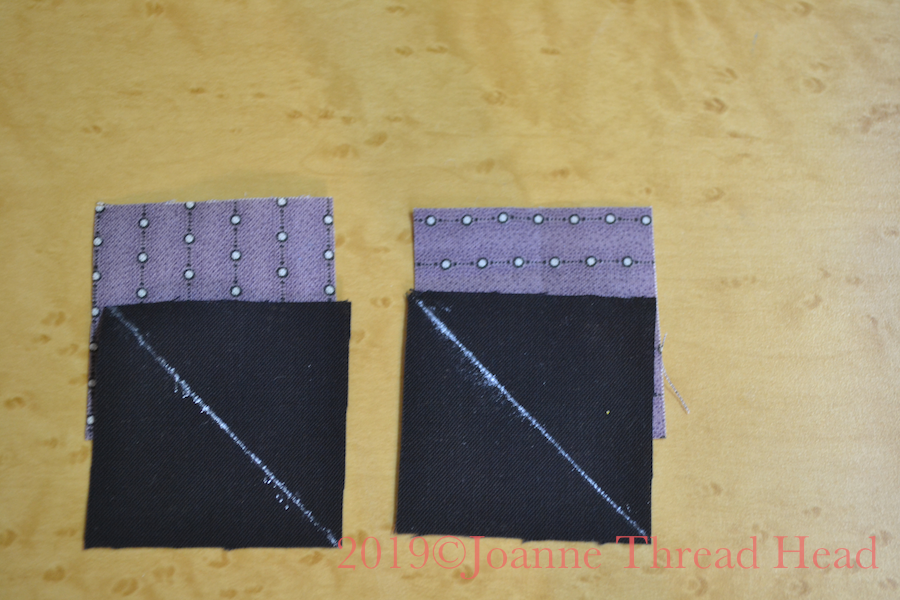
For directional fabric I stitch the diagonal line with each square of the directional fabric at right angles to each other as shown in the above photo, this way the directional fabric all lines up in the finished block.
Trim all the half square triangles to 1+1/2".
The layout for each block-
 |
| directional fabric for this block |

Sew the blocks together (I press the seams away from the half square triangles), and trim to 3+1/2".

For the layout you need 17 - 3+1/2" squares for the alternating blocks, and 2" strips for the border (I had 4 across the width of the fat quarter, but had to piece the ones for the long sides of the quilt top with the leftover pieces from the short sides).
 |
| layout |

To keep the points on the blocks stitch a couple of fabric threads away for the stitching lines on the points (this can only be done when the blocks are facing up).

I press the seams away from the blocks.

After piecing the top I layered it with a backing and two layers of batting - one thermofoil and one cotton - to make a table mat that was a bit heat resistant to protect the table, and one that would absorb a spilt drink (bound to happen).

I stitched in the ditch with a walking foot on the sewing machine around all the blocks and around the border. I also added the binding at this stage (before taking off the walking foot).

For the free motion quilting I used a Hera marker to mark a diagonal line across the alternating squares.

I stitched an Open Heart design in the alternating blocks.

It is one of the simplest designs to stitch, and I think it works perfectly as a continuous design in shapes that connect to each other like these alternating blocks. The centre line acts as a guide.

I used a white marking pen (that is later steamed away) to mark the centre spine of the feather for the border.

Stitching the binding on before quilting the border is the best way to be able to fill in the whole border area with quilting on such a small border (in this case 1+1/2"). Not cutting the extra backing and batting means that there is an area for my hand to make free motion quilting easier too.
 |
| back of the quilt |
I stitched on the Shoo Fly blocks with a simple corner to corner design in the background.
For the quilting I used a 100 wt thread - Invisafil by Wonderfil, in the top, and Bottom Line in the bobbin for most of the quilting, and 50 wt Aurifil in the bobbin for the border.

Made for this table! The table is made from the drawers of a 1914 cash register that was in the garage of our second house (an old neighbour help make it into a table).
I designed this quilt on EQ7, so I played around with other option too -
Scrappy like mine -

Three fabrics -

Two fabrics -

Christmas fabrics -

A 3 by 5 layout would be 12"x18" -

If you make a Shoo Fly Mini quilt send me a picture so I can add it here.
All the best!♥︎