

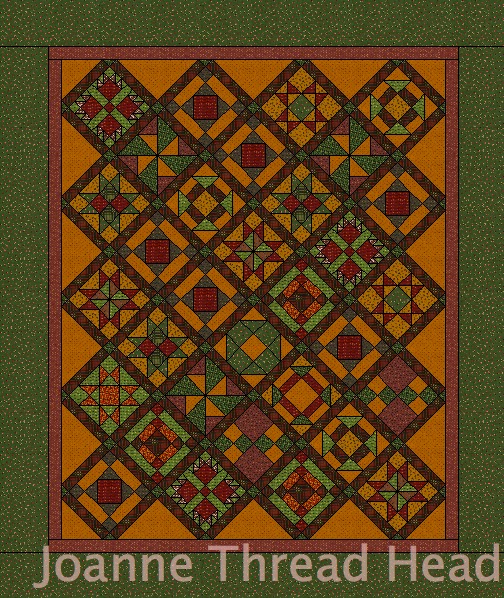
This is the layout I chose (thanks for telling me how to create this with EQ7 Raewyn!).
I did decide to use alternating colours for the zig-zag rows.
Here are the steps involved -

The triangles that make up the zig-zags are made from a 11+1/8" square that is cut into quarters on the diagonal. It is important to cut the triangles like this so that the rows don't have bias along the long edge
For 42" wide fabric you can get 3 squares per 11+1/8" strip. I used 4 strips of red and 3 strips of green, but I think you would only need 6 strips if all your triangles are the same (hopefully my math is correct).

The little triangles in the corners at the end of rows with whole blocks are made from a 5+7/8" square that is cut in half on the diagonal. I used 4 red squares and 2 green squares, so 6 squares if you are using one colour.

All the blocks, half blocks and setting triangles are laid out as shown in the above photo.
I have to admit that all the blocks are supposed to be trimmed to 7+1/2" squares, but not all my blocks were that big (I had a new 1/4" sewing foot that I struggled to find the "sweet spot" for, and my blocks ended up different sizes) - this layout was wonderful and I had no problem getting it all to fit. I assume it was because of the bias edges on the triangles.
Start by sewing rows.

Sew triangles to opposite sides of a block first.

It is easier to start sewing at the right angle of the triangle, because it lines up with the edges of the block.

Press the seam allowance to the triangle and trim off the little point.

With seams pressed in the opposite directions, you should be able to get nicely matched points when sewing the block and two triangle units together

Once all the rows are sewn, they are ready to be joined together. You can mark the centre of the triangle with a pin to make sure that it lines up with the corner of a block in the adjoining row - I did this at first, but found that it worked out fine all the same. I did pin the rows before sewing them together. Press the seams of the rows to one side or open the seams - whatever works for you (I prefer to press the seams to one side).

The finished quilt top! It is 50" x 70".
If you don't chose this quilt setting, there are all kinds of other possibilities of what to create with your quilt blocks. There are some ideas shown on the original quilt along post - shown here, and I made a Pinterest board with other ideas I found on Pinterest - shown here (I love Pinterest and
Sophie asked me to try out the following setting for her fabulous blocks -
sorry Sophie that I didn't change the colour of the quilt to reflect your blocks
This quilt would work out to be about 60" x 71" - using 1" sashing, and borders that are 1.5" and 6". The above picture has sashing strips that are 1.5", and the quilt would be slightly bigger. EQ called for less that a yard of fabric for the sashing and 2 yards of fabric for the outer border (I find that EQ does tend to overestimate fabric requirements). The triangles along the edges, and the ones in the corners would be the same size as the ones in the setting I chose.
If you would like any help with measurements for a setting you would like, don't hesitate to ask me (my email is found here).
Next week I will talk about quilting your quilt. I will have a few different suggestions and some tips, plus my finished quilt.
Thanks for quilting along!❤