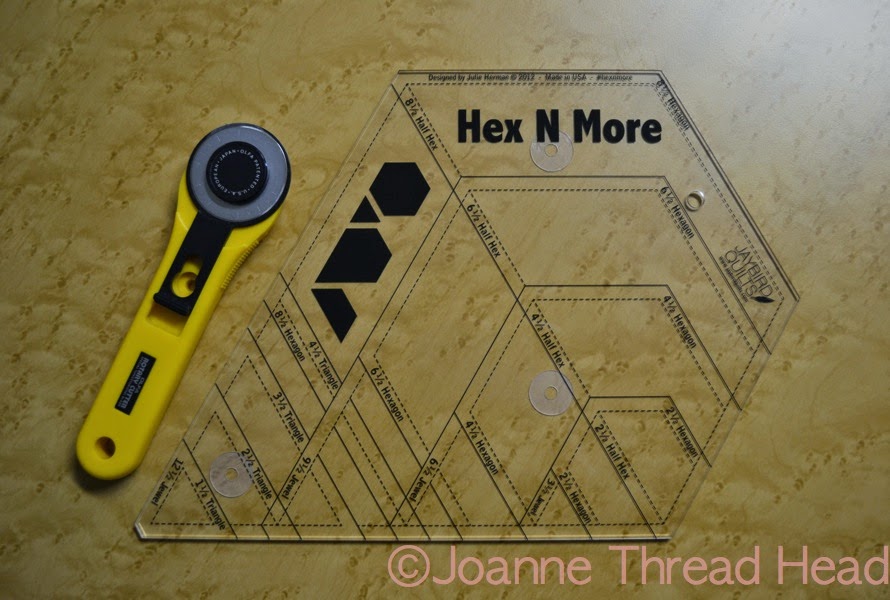
There are lots of patterns available, and because the ruler is so well designed it is pretty easy to figure out what shapes you need to cut to make a design.
I was excited to try it out, and made a pillow.
For the 'flower', I used a fat quarter that I have had for a while, with a bold, directional stripe. I always find these prints hard to work with (and there always seems to be one in a FQ pack), this seemed to perfect opportunity to use it. I marked lines on the ruler to correspond to the fabric when I cut the 'jewels' out. The triangles and jewels were cut with the Hex N More ruler.
For the 'leaves' I used a regular ruler, and the 60º angle.
All the pieces went together so well - I pressed the seams in opposite directions which helped.
I added a cut 1+1/2" border around the block.
The quilting was done with 100Wt thread and a #80 Microtex needle. I used a layer of cotton batting with half a layer of wool batting on the top (more on this further down).
To make it into a pillow, I made the back piece with buttons and button holes.
I made the binding a bit wider than I usually do (cut 2+3/4" wide, folded in half), I find that this works best with the extra layer of the back piece. The pillow is 21" from point to point and 17" top to bottom. I used leftover bits of wool batting to stuff a pillow form that I made for the inside of the pillow.
Wool Batting
I love wool batting! Silk and wool batting are the only types of batting I use for bed and lap quilts.
I am strongly attached to
Hobbs Tuscany Wool batting, but I was told that it was the same as
Hobbs Heirloom Premium Wool batting - just different packaging. So I thought I would see-
They seemed different straight out of the package. Maybe because the Heirloom was really jammed in the bag.
The Heirloom was definitely thinner and stiffer.
They were both creased. The Tuscany wool creases usually can be smoothed out when I pin the layers together.
The Heirloom wool creases seemed really set in.
I tried steaming the Heirloom wool batting to see what would happen.
It made a huge difference! It puffed out
a lot and became flat - that's the beauty of wool. After steaming my family couldn't tell the difference between the Tuscany and Heirloom.
I tried a different wool batting once, that I bought at a local fabric store off the roll. It was so disappointing! The wool bearded through. I have met lots of people since that have had the same problem with the wool batting from that store - that is why I stick to Hobbs.
It is wonderful to sleep under a wool quilt - it conforms to your body and seems to keep you at a perfect temperature, especially in summer. I also accidentally 'cooked' a quilt with wool batting in the dryer, it didn't shrink or change in any way.
I had a couple of questions yesterday about the 'half layer of wool on top of a layer of cotton batting' that I use for wall hangings etc.
Starting at a corner,
gently pull the two layers apart.
A piece of wool batting will divide into two layers pretty easily. I place a half layer of wool
on top of a piece of cotton batting.
This is a technique I learned from
Cindy Needham. The cotton adds weight and stiffness, while the wool shows off quilting so nicely - the best of both fibres. The half layer of wool adds very little bulk.
This is a close up of a piece I made over a year ago (
shown here), you can see the nice puffs the wool creates in the feathers.
Thanks for stopping by and have a great day!
♥