Showing posts with label tutorial. Show all posts

Tuesday, November 5, 2019

Shoo Fly Mini Quilt Tutorial

I recently made a new mini quilt and wanted to show how I did it.


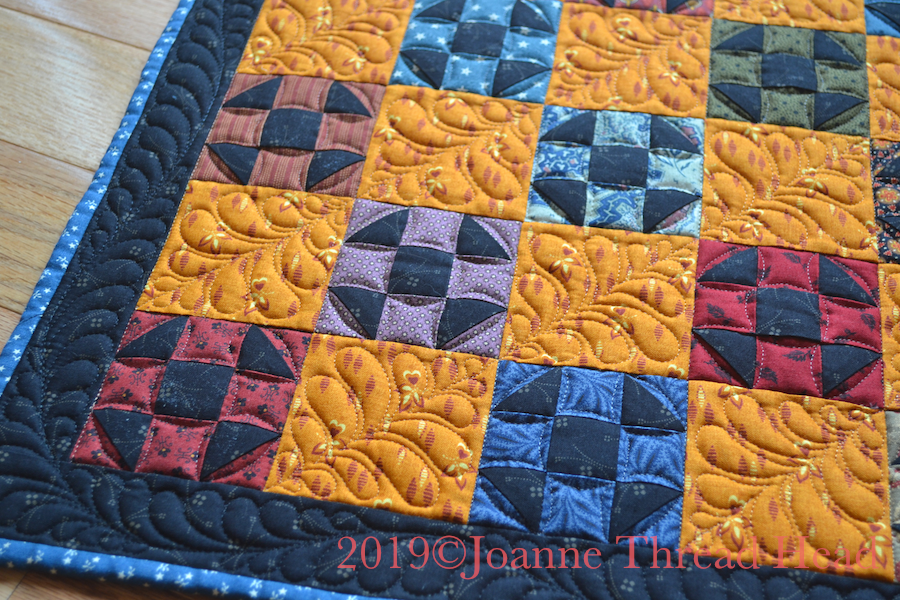
This is a Shoo Fly mini quilt with 3" blocks. It is 18"x24". It is a 5 by 7 block layout.
I chose a Shoo Fly block because it is a simple block that I think works well for such a small block.

For each 3" Shoo Fly block you need -

Print A -1 - 1+1/2" square (centre of the block)
               2 - 2" squares (for the half square triangles)

Print B - 4 - 1+1/2" squares
                2 - 2" squares (for the half square triangles)

For this quilt you need 18 Shoo Fly blocks.


I used all the same black fabric for Print A, and 18 different fabrics for Print B. This is a great way to use up scraps of fabric. It is also fat-quarter friendly - I used the same black fat-quarter for the centre of the blocks and the border (my fat quarter was a metric one though, so a bit larger than one based on a yard).

I sewed all the half square triangles at once using this method - link.
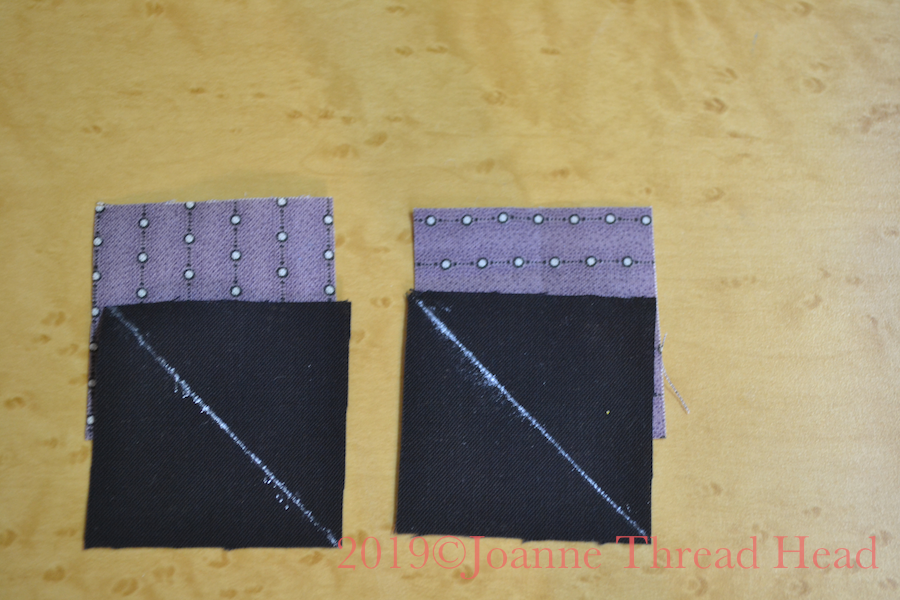

For directional fabric I stitch the diagonal line with each square of the directional fabric at right angles to each other as shown in the above photo, this way the directional fabric all lines up in the finished block.
Trim all the half square triangles to 1+1/2".

The layout for each block-

directional fabric for this block

Sew the blocks together (I press the seams away from the half square triangles), and trim to 3+1/2".


For the layout you need 17 - 3+1/2" squares for the alternating blocks, and 2" strips for the border (I had 4 across the width of the fat quarter, but had to piece the ones for the long sides of the quilt top with the leftover pieces from the short sides).

layout


To keep the points on the blocks stitch a couple of fabric threads away for the stitching lines on the points (this can only be done when the blocks are facing up).


I press the seams away from the blocks.


After piecing the top I layered it with a backing and two layers of batting - one thermofoil and one cotton  - to make a table mat that was a bit heat resistant to protect the table, and one that would absorb a spilt drink (bound to happen).


I stitched in the ditch with a walking foot on the sewing machine around all the blocks and around the border. I also added the binding at this stage (before taking off the walking foot).


For the free motion quilting I used a Hera marker to mark a diagonal line across the alternating squares.


I stitched an Open Heart design in the alternating blocks.


It is one of the simplest designs to stitch, and I think it works perfectly as a continuous design in shapes that connect to each other like these alternating blocks. The centre line acts as a guide.


I used a white marking pen (that is later steamed away) to mark the centre spine of the feather for the border.


Stitching the binding on before quilting the border is the best way to be able to fill in the whole border area with quilting on such a small border (in this case 1+1/2"). Not cutting the extra backing and batting means that there is an area for my hand to make free motion quilting easier too.

back of the quilt

For the border I did a Bump-Bump Feather on a spine that meanders from one edge of the border to the other. I stitched the border in three passes  - the spine first and then the lobes on one side and then the other.

I stitched on the Shoo Fly blocks with a simple corner to corner design in the background.

For the quilting I used a 100 wt thread - Invisafil by Wonderfil, in the top, and Bottom Line in the bobbin for most of the quilting, and 50 wt Aurifil in the bobbin for the border.


Made for this table! The table is made from the drawers of a 1914 cash register that was in the garage of our second house (an old neighbour help make it into a table).

I designed this quilt on EQ7, so I played around with other option too -

Scrappy like mine -


Three fabrics -


 Two fabrics -


Christmas fabrics -


A 3 by 5 layout would be 12"x18" -


If you make a Shoo Fly Mini quilt send me a picture so I can add it here.

All the best!♥︎

Tuesday, October 29, 2019

Embroidered Pillow

My Dad embroidered this lovely little picture recently-


It is counted needle point. My parents blocked it and I blocked it again but it still ended up a bit slanted, so I thought it would work best as a pillow and wanted to show how I did it.


I made a backing with a button opening. I did use some interfacing along the button and button hole edges to make it more stable.


I used a piece of white flannel to line the piece of embroidery, and layered the embroidery and backing with wrong sides together,


And stitched around the edge of the embroidery, first with a straight stitch and then a zig-zag stitch to secure the edges. I used a walking foot on my machine to help with the sewing.


I cut out the shape close to the stitching.


While it was at this stage I cut out two pieces of fabric the same shape to make a pillow form for the inside (I stitched around the piece with right sides together, leaving a small opening, turned it right side out, stuffed it and stitched the opening closed using the sewing machine, enclosing the raw edges). I stuffed the pillow form with some leftover wool quilt batting that I pulled apart.

To finish the edges I made a piece of bias binding with the same backing fabric using this method. I used a 12" square piece of fabric to make about 46" of 2+1/2" wide bias binding, that I pressed in half before stitching it around the pillow. I didn't pull on the bias binding while sewing it down (again using a walking foot on the machine). I joined the ends of the bias binding on a 45 degree angle and stitched them together - this takes a bit of pinning and checking before sewing to make sure the binding ends up the right length. I stitched the binding down on the back by hand.


I am really happy with how it turned out. You can't tell that it is not perfectly oval. The cushion is about 8"x10".

All the best!♥︎

Wednesday, May 24, 2017

Celebrating Canada's 150th Birthday!

In honour of Canada's 150th Birthday this year I designed a mug rug pattern to share.


The finished piece is about 9"x14". It uses appliqué and piecing techniques.

I think what really makes this mug rug is the Delectable Mountain quilt blocks used on the sides - they are similar to Maple Leaves on their own.

I used Bali/batik fabric in red and an off-white print (white would be great, but as it is a mug rug I knew stains would happen and this fabric already looked like coffee stains). I am sure two fat quarters would be enough - I just used scraps I had at home.

The piece starts with the Delectable Mountain quilt blocks -


You will need four each in red and white fabric - 4+1/4" squares.

Make Half Square Triangles with a red and white square (this is where lay the two squares right sides together, draw a diagonal line on the back of the light square and stitch 1/4" on both sides of the line. Cut on the line and press the seam to the dark - If you need more detailed instructions here is a link to my tutorial for Easy Half Square Triangles). You will make 8 blocks.


Trim the Half Square Triangle blocks to 3+3/4".


Place 2 squares right sides together, with opposite colours together,


the seams kind of 'lock' together.


Cut the block into three pieces 1+1/4" wide-


This creates 6 pieces that are opposite colours.


Do this will all the blocks (there are 24 pieces, 12 for each border).


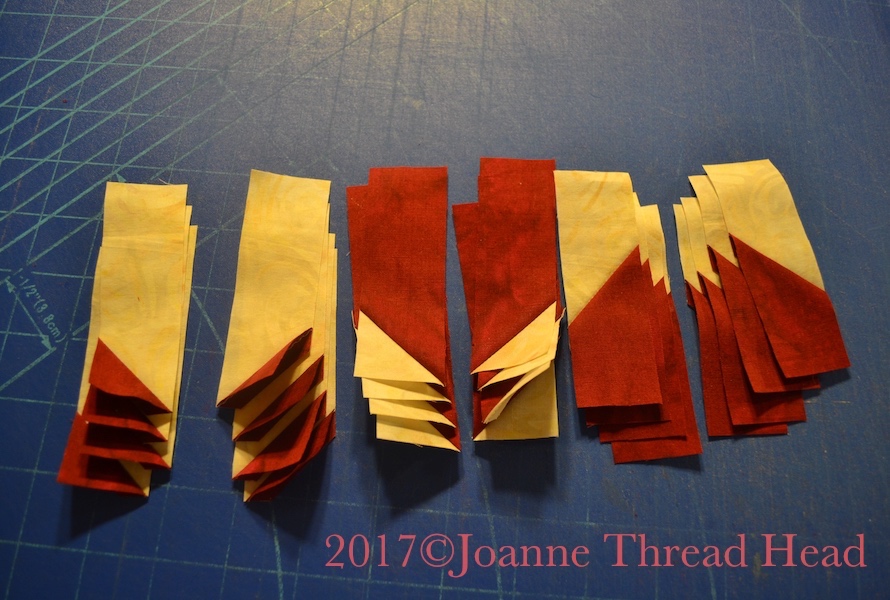
The strips are laid out as in the above photo and sewn together to form the two borders.


Sew the two borders to a 8" x 9+1/2" square of white fabric (the 9+1/2" should be the width of the finished borders, I cut the fabric out 10" and trimmed it after adding the borders). The fabric is now ready for the appliqué!


I don't have a PDF, but you can just save the above image and paste it in app/program that you use to create documents - enlarge the image to fit a regular piece of paper (there is a 1" guide on the image). (There are also online 'Image to PDF' convertors that you can use - save the image and upload it to the site you choose - search 'Image to PDF). (If you really can't create your own pattern email me and I can send it as a PDF - the link for my email in in my profile, linked on the side bar).


I used my favourite Invisible Machine Appliqué for the appliqué - here is a link to one of my tutorials and another one. Any appliqué method would work. For the '0' I opted to add the centre as a separate piece using the white background fabric on top of the red just to make it easier to get the freezer paper pieces ready. You can see that the appliqué pieces overlap onto the borders.


When using the Invisible Machine Appliqué technique with freezer paper remember to press all the points down first.


I layered the the finished piece on to two layers of batting (the bottom one cotton and the top wool) because I find that two layers of batting work well for mug rugs (absorbs heat and spilled mugs).
A mug rug should be heavily quilted to make it lay flat, and so that mugs aren't tippy on it, but I did decide to leave the red parts of the appliqué un-quilted so they would puff  up a bit (I think I will be thankful that I used fabric that already looked stained!).
I free motion quilted in the ditch around all the appliqué and the red of the border, quilted parallel straight lines in the red border, and sort of radiating lines from the centre in the white.


Enjoy!

Have a great day and thanks for stopping by.♥︎

Tuesday, February 7, 2017

Valentine Mug Rug Tutorial

This is the next in my series of Mug Rug tutorials - perfect for Valentines Day or a Wedding Anniversary (like mine - our anniversary is in less than a week - my husband asked if this was his anniversary present).


This is using the hexagon shaped mug rug base from another tutorial (I said I would be having more tutorials for that shape) - Hexagon Shaped Mug Rug Tutorial.
I used a 5" radius for this hexagon, the finished mug rug is 10" point to point and about 8.5" straight edge to straight edge.

This is the most simple appliqué, and any size or shape base will work.

I used the invisible machine appliqué technique (my tutorial can be found here), but your favourite  appliqué method will work.
I have learned that the invisible machine appliqué technique stands up to repeated washings and scrubbings, which can't be said for every appliqué technique - this is a mug rug after all, and tends to get spilled on.


To make a mug rug like mine you will need about a 11" square of background fabric, 1.5" strips of fabric for the binding (2 strips across the width of a fat quarter worked for me), and a few assorted scraps of fabric for the appliqué. As well as the invisible machine appliqué necessities  - freezer paper (from the grocery store), glue stick glue (just paper one is fine), Roxanne Glue Baste or liquid white glue,


100wt thread to match the appliqué fabric (I used Invisafil by Wonderfil), or polyester invisible thread.


I cut out the background fabric slightly larger than the finished shaped to allow for any shrinkage during machine quilting.


For the Appliqué -


I cut out heart shapes from 2 pieces of 4" square freezer paper folded in half (mine were cut out at the same time, but different shaped hearts would be nice too).


I also cut out 3 freezer paper circles - I drew out one circle on the freezer paper, it is about 1" (traced around an old spool, a coin, a circle template...), stapled it together with two other pieces of freezer paper and cut out 3 matching circles.


I glued the freezer paper shapes, waxy/shiny side up to the wrong side of the fabric, using glue stick and cut out a 1/4 seam allowance (on the bigger side of 1/4" for me).

Preparation of the Appliqué Pieces -

This is the most important part of the process, and really effects how the finished product will look.


The seam allowance for the appliqué needs to be pressed to the waxy side of the freezer paper, so I like to baste a little gathering stitch around any curves - tiny stitches make smoother curves.


I stitched around the curves on the hearts and all the circles.

I use the tip of a hot iron, with no steam, to press the seam allowances, and a pressing board that is very hard (no padding).


I like to press the points first,


add a bit of glue stick glue,


and fold the rest of the point to create a crisp corner.


The top of the heart needs to be clipped almost to the paper. Extra machine stitches should be added in this area too when attaching the appliqué to the background.


For the circles I like to pull the gathering stitches tight,


press the opposite side from the gathering thread ends,


and then press all around the circle.


Make sure to clip the gathering thread ends so they don't get caught and pull the seam allowance off the wax.

Now comes the fun part of deciding how you want the mug rug to look -


Once you decide glue the pieces to the background with small dots of liquid glue (Glue Baste). If any pieces overlap the bottom ones will need to be stitched down first and the paper removed before adding the next piece. I opted for a simple one layer of appliqué, and glued all the pieces at once.


I pinned the hearts first and lifted the edges to add the glue.


The circles were easier to glue.


Once everything is glued, I like to weight it down to set while I get my sewing machine ready.


This technique uses a very small zig-zag stitch - I use a shorter than normal stitch length and just 'off the straight' for the stitch width. The tension is also adjusted (loosened I believe) so that the top thread is drawn slightly to the bottom.


Especially with 100 weight thread, the stitches really do become invisible.


I use an open toe embroidery foot. The bobbin thread is just regular sewing machine thread to match the background.


Once all the stitching is complete,


the fabric behind the appliqué needs to be cut out, leaving a large 1/4" seam allowance.


Then the freezer paper can be removed (tweezers help with the little pieces).


I like to use a bit of spray starch for the final pressing, and the pieces is ready for embellishment.

I decided to add some decorative machine stitching around the hearts just because I never use those stitches.


Since I decided to add a bit of machine embroidery around the hearts I added a bit of interfacing on the back as a stabilizer.


I used a heavy weight variegated thread and a top stitching needle in the machine.


After stitching I cut away all the interfacing in the back because I did not want it to affect the quilting.


For the free motion machine quilting I outlined the shapes, chose parallel lines (straight and curved) for the bulk of the quilting and swirls in the circles. I always like to try something new for a project and since I struggle to use striped fabric I decided to use some for a heart - I really like how it looks after quilting (and I learned that I really can't follow lines!).

I used 100wt thread (Invisafil) for the quilting, and 2 layers of batting (one silk and one wool because that is what I have scraps of). With heavy quilting it came out nice and flat.


After quilting I cut the shape out and applied the 1.5" binding as shown in the hexagon shaped mug rug tutorial.


My Mother made a log cabin table mat from my last tutorial! With simple walking foot quilting and no appliqué it looks beautiful.

Have a great day and thanks for stopping by!♥︎
Related Posts Plugin for WordPress, Blogger...